Base Models
The beroNet Session Border Controller has 3 different Base Models:
...
The PCM connector has a second usage: on the Pins in the 8th row a hardware factory reset can be made with a jumper. See more under How to do a Hardware Factory Reset (Gateway V2 / SBC - VoIP Gateway) Page.
Opening the SBC
To open the SBC in order to add add / remove Expansion Modules you should open the front panel and remove the top panel:
...
You can see the 3 Module slots and corresponding 3 Module Connectors.
Modules
All Modules that fit in the beroNet Gateway and Card range can also be used in the beroNet SBC:
- ISDN (high precision +-2.5PPM): 4xBRI / 2xPRI (E1/T1) / 1xPRI (E1/T1) - the old 2xE1 and 1xE1 Modules work also, but have no high precision clock.
- Hybrid: 2BRI + 2FXS
- Analog: 4xFXS / 8xFXS / 4xFXO
- Mobile: 2xGSM / 2xLTE
Module Connectors
Depending on the Module different Connectors are used within the Gateway:
| Connector | Pictures | Can be used with Modules |
|---|---|---|
| BNSBCPLUG |
|
|
| BNSBCPLUGPRI |
|
|


Connector Port Layouts
The following schema shows which module port is located on which connector port:
Module Connector Pins
BNMO-4BRI (4x BRI/ISDN)
The BNMO-4BRI module has 4 ISDN/BRI ports. The module can be configured individually for each port to NT (Network Termination) or TE (Terminal Equipment) mode. In either mode the module supports Point-To-Multi-Point (PMP) or Point-To-Point (PTP). The TE/NT mode as well as the line-termination of 100 OHMs are selectable via software (Jumper Free).
The ISDN Ports use the following RJ45 Pins:
| Port X | |
|---|---|
| PIN | Usage |
| 3 | TX+ |
| 4 | RX+ |
| 5 | RX- |
| 6 | TX- |
BNMO-xPRI and BNMO-xE1 (1,2 ports ISDN PRI)
The BNMO-xPRI modules are available as 1 port or as 2 port variants. The modules can be configured individually for each port to NT (Network Termination) or TE (Terminal Equipment) mode. If you want to use NT-mode you may need a cross cable which is optionally available (the BNE1Cross). Line termination (120 ohm) is selectable for each port by DIP switches on the module(2 per port). Only the BNMO-xPRI have a "high precision clock" with +-2.5ppm.
| Port 1 | Port 2 | ||
|---|---|---|---|
| PIN | Usage | PIN | Usage |
| 1 | RX- | 1 | RX- |
| 2 | RX+ | 2 | RX+ |
| 4 | TX- | 4 | TX- |
| 5 | TX+ | 5 | TX+ |
BNMO-4FXS (4 ports analog FXS)
The BNMO-4FXS module is a 4 port FXS module for the beroFix baseboards and boxes. The BF4FXS module is used by small and medium enterprises which need internal analog FXS ports to connect analog phones, faxes and modems.
The pinout looks like:
| Port X | |
|---|---|
| PIN | Usage |
| 4 | TIP |
| 5 | RING |
BNMO-4FXO (4 ports analog FXO)
The BNMO-4FXO module is a 4 port FXO module for the beroNet mainboards and boxes. The module provides 4 FXO (Foreign Exchange Office) ports for the beroNet SBC. It can be used to connect a SoftPBX to the PSTN as well as a traditional PSTN based PBX. It is fully compatible and can be combined with all beroNet modules, cards and boxes.
The pinout looks like:
| Port X | |
|---|---|
| PIN | Usage |
| 4 | RING |
| 5 | TIP |
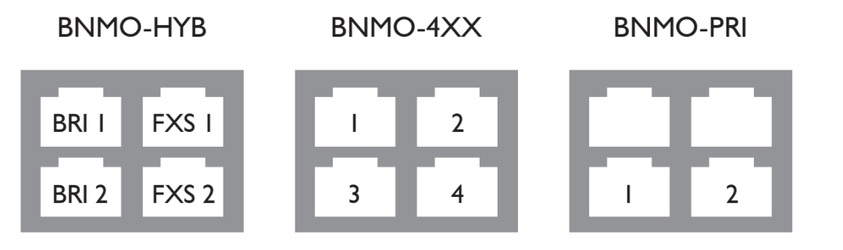
BNMO-HYB (2 ports ISDN BRI + 2 ports analog FXS)
The BNMO-HYB Hybrid Module is a 2 Port BRI and 2 Port FXS Module for the beroNet Baseboards and Boxes. Each BRI port can be configured as NT (Network Termination) or TE (Terminal Equipment). In both modes, each BRI port can operate in Point-to-Multi-Point (PMP) or in Point-to Point (PTP) mode. The switching of the TE / NT mode and the deactivation of the termination resistors can easily be set in the software (Jumper Free) which makes the troublesome repositioning of jumpers unnecessary. Additionally the module provides 2 ports FXS (Foreign Exchange Station) for the beroNet Gateway. FXS interfaces are used to connect devices like analog phones or faxmachines to your beroNet SBC.
The Pinout for the different port looks like:
| Port BRI-1, BRI-2 (ISDN) | Port FXS-1, FXS-2 (FXS) | ||
|---|---|---|---|
| PIN | Usage | PIN | Usage |
| 3 | TX+ | 4 | RING |
| 4 | RX+ | 5 | TIP |
| 5 | RX- | - | - |
| 6 | TX- | - | - |
Quick Installation
For further Information on how to assemble new modules refer to the Quick Installation Guide:
...