Current beroNet Hypervisor State is Beta. Please see 0. Hypervisor State for more details.
| Table of Contents |
|---|
Logging in
...
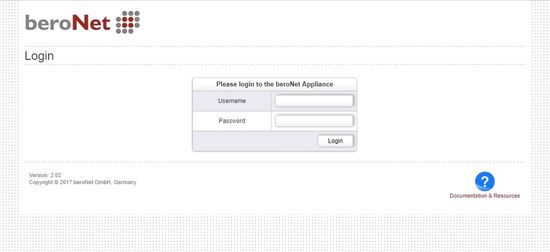
As soon as you have accessed the Hypervisor Web-interface you can login with the default credentials:
- userUsername: admin
- passwordPassword: beronet

Make sure to change the passwort password later in the menu under "System->change passwordSettings+ → Security Settings → GUI-Password"
The Hypervisor GUI allows it to:
- manage virtual machines
- create and restore backups of machines
- use the beroNet Appliance Market to download ready Apps and ISO Installation Media
- discover a built in beroNet Gateway or beroNet Gateways in the local network
Virtual Machines
...
How to install an OS in a VM
To install an operating system as a VM you need to follow the steps:
- Download an ISO file which contains the operating system either from a web-rul URL or form from the marketMarket; or upload an ISO file using the upload feature in the GUI
- Create a VM and define its metric and select your chosen ISO under "boot from ISO".
- Start the VM from the Dashboard
- Access the VNC console via the VNC link in the Dashboard
- Complete the installation using the prompts provide by your chosen OS. When completed, use the hypervisor dashboard to shutdown or poweroff the machine.
- On the Dashboard select "manage" next to your recently installed VM. Under "system" change the boot-device disk to "c (disk)"
- Restart the VM
Dashboard
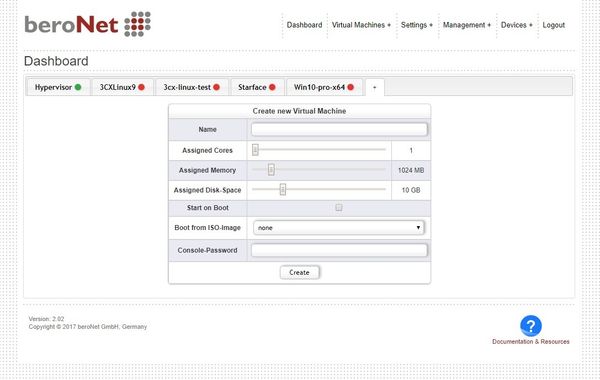
The dashboard Dashboard shows all VMs and all ISO filescurrent system loadout.

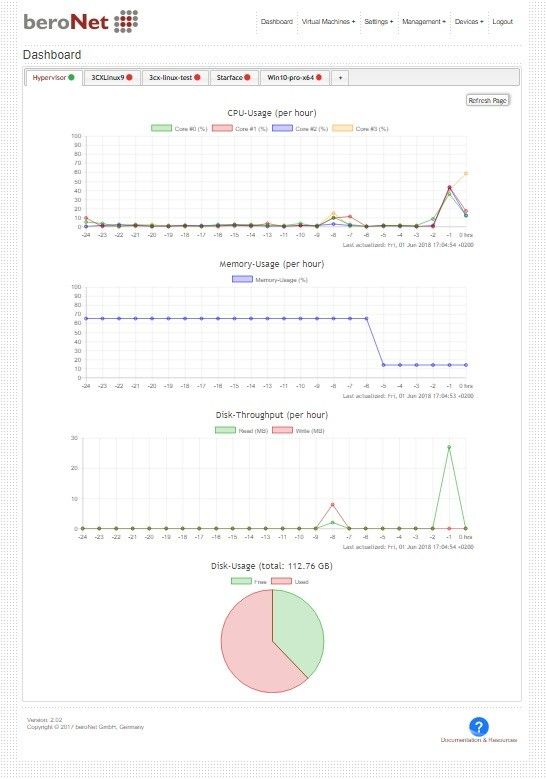
Each VM can be started by clicking the on "startStart" link if they are in the state "STOPPED". If they are in the state "RUNNING" the VM can be accessed via VNC, halted via the "shutdownShutdown" link button or powered off via the "PoweroffStop" linkbutton.
VNC - Console/Monitor for the VMs
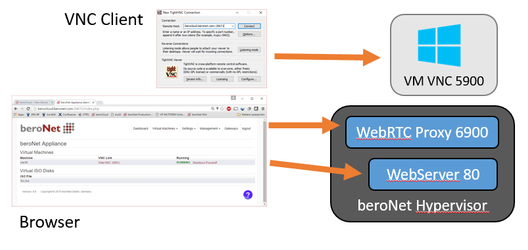
By default each Virtual Machine starts a VNC Server on the Ports between 5900 - 5905. Any VNC tool can connect to this port, e.g. tightvnc for linux and windows: TightVNC
...
The following picture shows how a browser can use the WebVNC on port 6900 and the Webserver on port 80 and how a VNC client can directly connect to the VMs VNC Server on port 5900:

Manage VMs
Under "Virtual Machines->Manage VMsDashboard" you can create new VMs, edit, delete or rename existing ones.

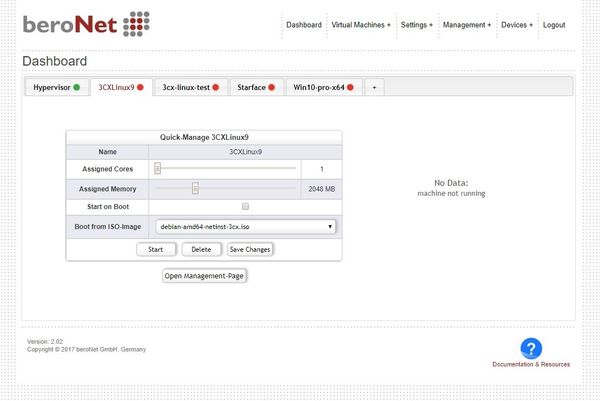
By clicking on New "+" the VM Create wizard opens and allows to create a new vmVM.

After clicking on Create you "+" you can modify the VM Details in the VM Manager.In the List of Virtual Machines you can always find a "manage" button which brings you to the VM Manager
of this machineBy selecting the VM you want to edit and clicking on "Open Management-Page" the VM can be modified any time.
VM Details
The VM Manager is divided in different sections:
...
Virtual Machine Status
Shows the current status of the VM and allows to do actions with it. The actions are:
- Power On / OFF
- Shutdown
- Sleep / Wakeup
- Clone
 :
:
- Open VNC-Console
- Suspend
- Start / Stop
- Reboot
- Shutdown
- Rename (VM must be stopped)
- Delete (VM must be stopped)
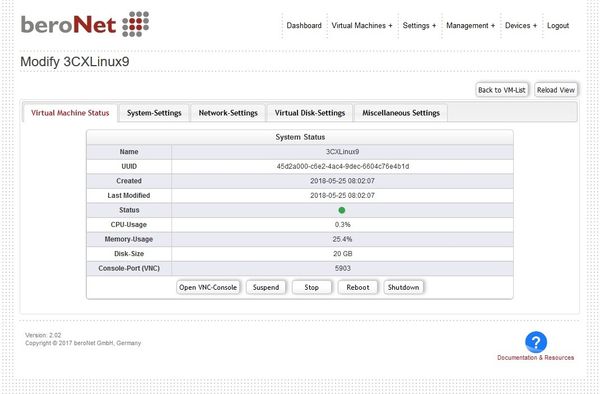
Additionally you can use the built-in WebVNC tool to connect to the console of the VM.
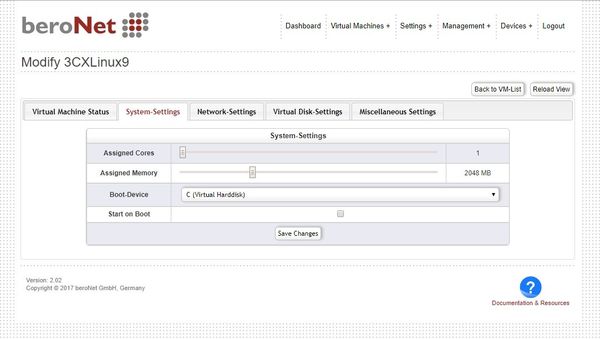
SYSTEM
In the System Settings you can define:
* # CPUs        Assigned Cores:       - The amount of CPUs for this virtual machine, one is reserved for the Hypervisor
* Memory in GBAssigned Memory:         - The amount of memory for this VM, 1GB is resevedreserved for the Hypervisor
* Start on boot        - defines if the VM should be started automatically during boot
* Boot-Device:          -Defines defines if the VM boots from it's virtual hard-drive or from the ISO file for installation


...
* Start on boot: -Defines if the VM should start automatically during boot
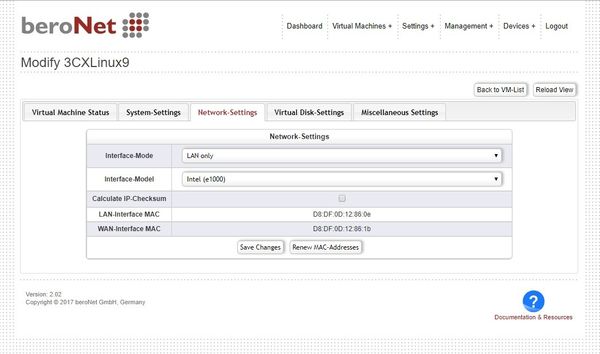
Network-Settings
Under the network settings you can define:
* NIC-Mode             - defines if the VM should access both the LAN and WAN port or only the LAN port of the appliance (NOTE: for LAN-WAN mode, LAN-WAN mode needs to be activaedactivated under System->networkSettings+ --> Network Configuration)
* NIC-Model            - Realtek RTL8139 or Intel e1000 the emulated NIC Model for the VM
Also the MAC Addresses of the VM are visible here. The WAN Mac Address is only relevant in the lan-wan mode.

...
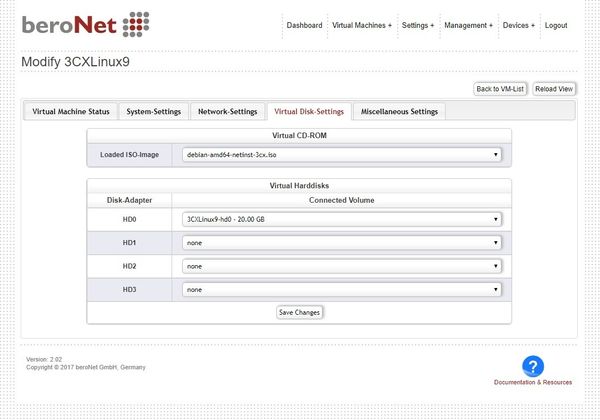
Virtual Disk-Settings
The Disks Manager allows to create, delete and reorder virtual disks. Also It defines if an ISO Intallation Installation Medium is inserted in the VM. NOTE: a deleted disk can not be recovered!

...
Miscellaneous Settings
Under other, you can mainly find the VNC and miscellaneous settings:
* VNCConsole Display    Port (VNC):      -Defines defines the VNC display port number
* VNCConsole Password (VNC):        - defines-Defines the VNC access password
* VNCConsole Keymap       (VNC):    -Defines defines the VNC virtual Keyboard Keymap
* HVHypervisor Options           -Adds adds the possibility to add manually XEN option, for reference: xen options, multiple settings can be seperated by ; as                           localtime=1;
* Windows-Tools            -If if enabled the VM has another disk containing the PV driver for windows, which boost the performance of a windows VM (NOTE: preinstalled with the market windows images)

CLONES
...

Backup & Restore
The Hypervisor can backup & restore both full VMs and ISO files. In the Backpup & Restore-Manager the attached USB drivers are displayed. All local storage disks are shown under "Backup+".
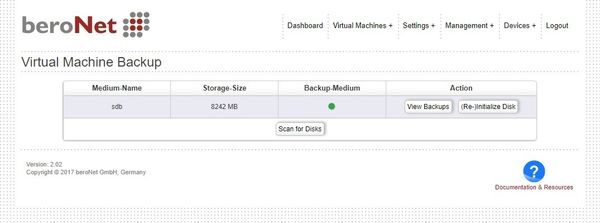
If no disk was found, attach a USB drive and click on "scan Scan for new devicesDisks". If the drive is not yet a "backup-space" for the Hypervisor, the drive needs to be formatted as backup space.
To make a backup or restore already made backups click on the USB drive link"View Backups".

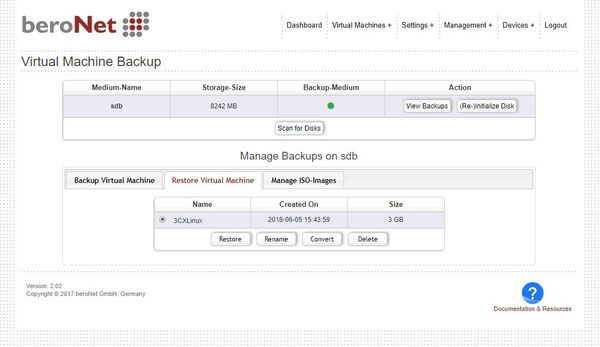
In the restore "Restore Virtual Machines" tab, previously backuped ISO files and Apps (VMs) can be restored back to the hypervisor Hypervisor disk. This may take several minutes and even hours depending on the file size and if the file is compressed. The backups can also be deleted here.
In the "Backup -TabVirtual Machines" tab local VMs and ISO files can be backuped. VMs can be compressed in order to save drive space.

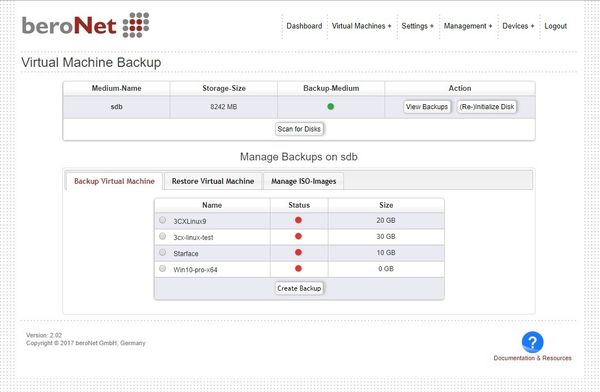
Make sure that the drive is large enough to hold a compelete complete VM. Creating a backup can take several minutes and even hours, depending on the filesize file size and wether whether compression is used or not.
Remote Backups
The Appliance Hypervisor provides the possibility to backup your VM's via ssh to a remote second Appliance in the same network on a schedule or directly.
For a full in-depth Tutorial, check out this Guide:
ISO Manager
The iso manager ISO Manager shows the lokal local stored ISO files which can be used to boot a VM to install the OS provided in the ISO file (e.g. an Ubuntu ISO for installing Ubuntu in a VM). Isos can be deleted via the "delete" link.
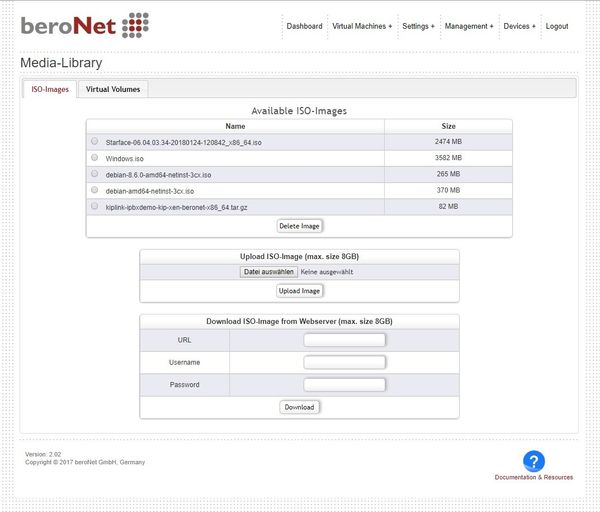
There are 3 2 ways to get an ISO on the appliance:
- Web-Download
- The Web-URL of the ISO can be provided. If it is protected with basic authauthentication, a username and password can be provided in the syntax "user:password". NOTE: this can take several minutes and even hours, depending of the size of the ISO and the internet speed.
- Upload
- An iso ISO of up to 8GB can be uploaded directly via the browser. NOTE: this can take several minutes and even hours, depending of the size of the ISO
- Windows Share Download ONLY V0.3
- With Window share credentials:
* Domain        e.g.  beroNet
* Share Name    e.g.  //beronas/ISOs   (the share is only one Folder on the Server, like //SERVER/SHARE and SHARE does not have subfolders)
* user          e.g.  beroUser
* password      e.g.  beroPassword
a windows share, fileserver or NAS can be browsed. After clicking on an ISO File, the file will be downloaded. NOTE: this can take several minutes and even hours, depending of the size of the ISO
- With Window share credentials:
beroNet Appliance Market
The beroNet Appliance Market allows it to download pre-installed Virtual Machines. These machines can be started directly in the Hypervisor. The Market also allows to donwload ISO Installation Media for setting up new Virtual Machines.

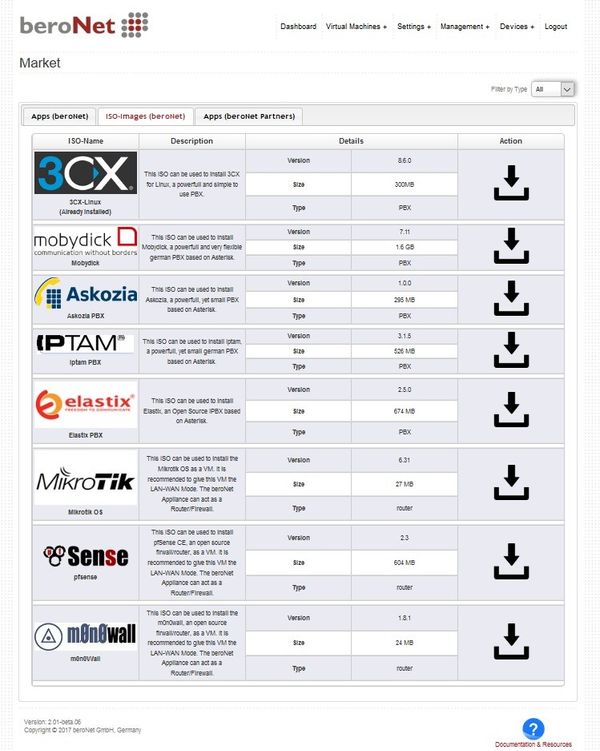
Each VM or ISO has additional Meta Information like the version and the size. By clicking the download icon the VM or ISO will be downloaded to the lokal appliance.
NOTE: this can take several minutes or even hours, depending on the size and internet speed
How-to use clones / snapshots
The beroNet hypervisor GUI allows to create thin clones of existing VMS. A clone is not a full copy of a VM. The disks of the clone reference back to the parent so that only the differences for each clone are stored within the clone, while the main data resides within the parents disk. The mechanism used here is copy-on-write. The parents disk is not modified while the clones run, this means the parents VM state is saved as a snapshot. When the clones are deleted the parent can run again from the moment on when the first clone was created. At later times other clones can be created from the parent or even from clones.
The result is a tree, like in this example:

...
"Parent" and "clone 2" can be seen as snapshots as they preserve the VM state at the time when they ran at last.
...

After that the cloned VM becomes a parent and is in the STATUS CLONED:
![]()
Also a list of all clones of this VM is displayed:

You can always create new clones from this parent VM. These clones will have the state of the parent last time it was powered off.
System
Update Hypervisor
...
System
...
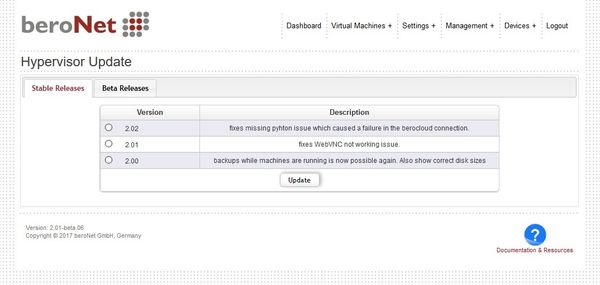
Update Hypervisor
In order to update the Hypervisor navigate to "Management+ → Hypervisor Update" and select the version you want to install.

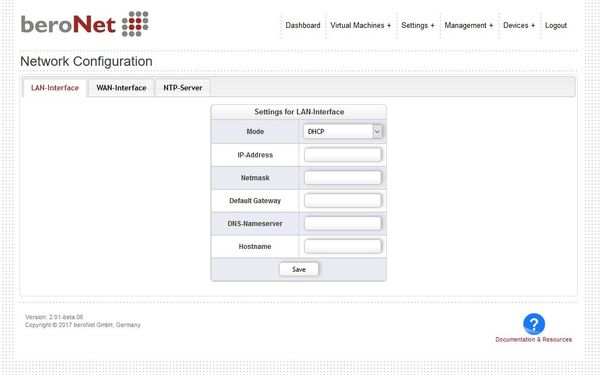
Network Settings
Navigate to "Settings+ → Network Configuration".
The Network Manager allows you to choose the Interface Mode of the appliance:
...
The LAN Mode can be defined as DHCP or static. If it is static the LAN Settings need to be defined. These settings do only apply to the LAN interface of the Appliance. The WAN Port however can only be controlled from within a VM which has the LAN-WAN mode enabled.

Cloud Settings
Navigate to "Settings+ → Remote Management".
The cloud manager Cloud Manager allows to register the appliance into the beroNet cloud Cloud or into a private beroNet cloudCloud.
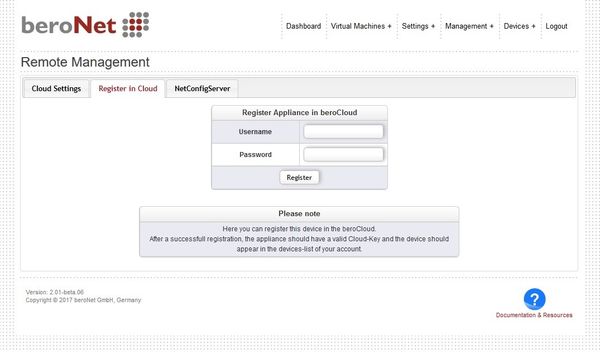
After successfull successful registration a cloud key appears. The appliance starts communication with the beroNet cloud Cloud after enabling the cloud and after clicking "cloud enableEnable".

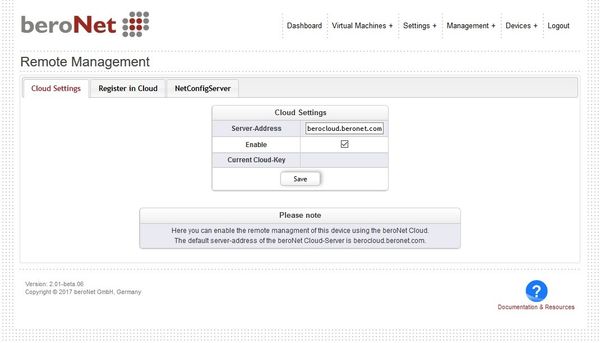
NOTE: a reboot of the hypervisor might be needed to register the appliance in a different cloud'
Reboot & Halt
...
Navigate to "Management+ –> Reboot & Shutdown".
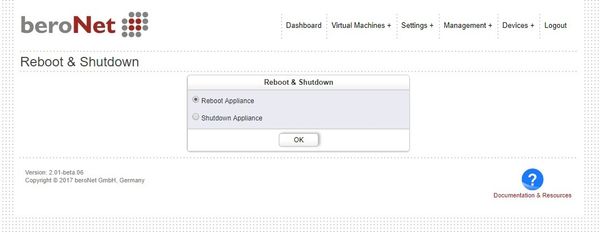
By clicking "CLICK HERE FOR REBOOTING THE APPLIANCEselecting "Reboot Appliance", the appliance does a will reboot.
NOTE: all VMs will be halted ungracefully
By clicking "CLICK HERE FOR SYSTEM SHUTDOWNselecting "Shutdown Appliance", the appliance will turn itself off.
NOTE: it remote Power ON is not possible to turn on the appliance from remote
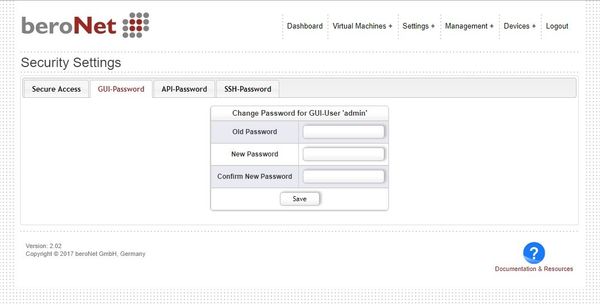
Change password
Under System->change password"Settings+ → Security Settings", the password of the admin GUI User can be changed.
Gateways
...
The Gateways Manager starts a "bfdetect" in the background and shows a list of all local appliances beroNet Appliances and Gateways with their Serialsserial numbers, Firmware Versions, IP Addresses and MAC Addresses.
Navigate to "Devices+ → Gateways".

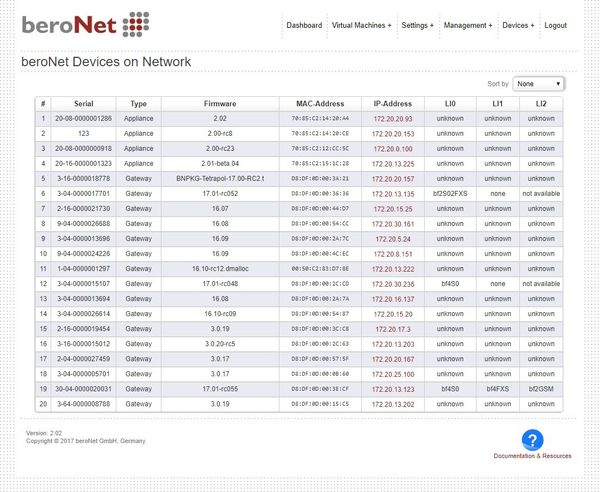
By clicking on the IP Address, the browser will be redirected to the gateway/appliance GUI.
Setup Gateway: Gateways and Cards