...
- user: admin
- password: beronet

Make sure to change the passwort password later in the menu under "System->change password"
...
The dashboard shows all VMs and all ISO files.

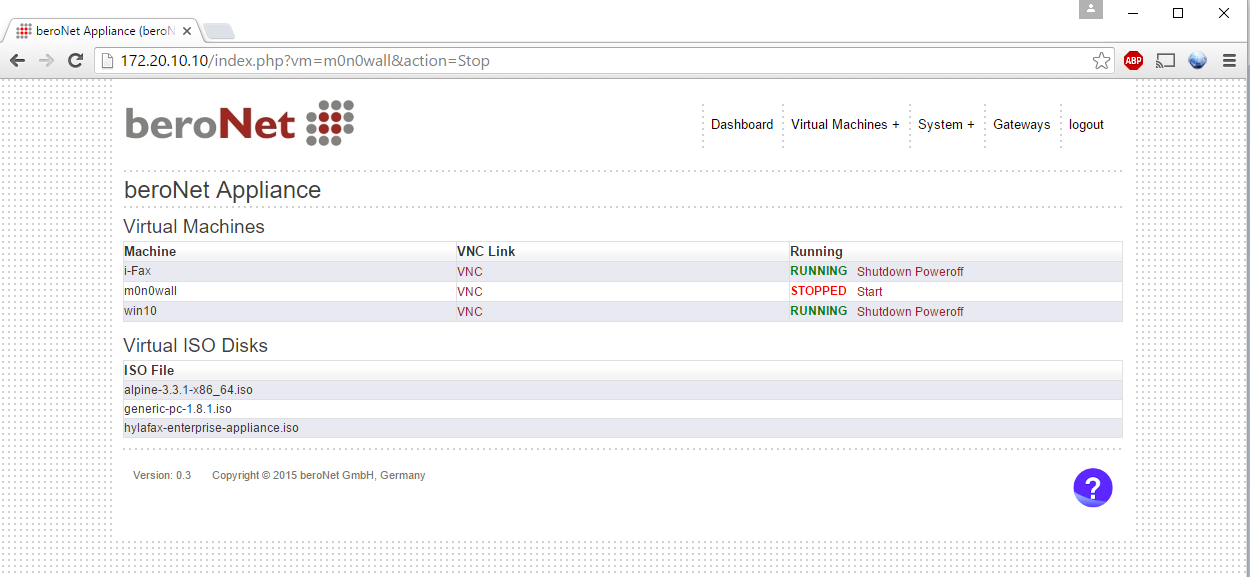
Each VM can be started by clicking the "start" link if they are in the state "STOPPED". If they are in the state "RUNNING" the VM can be accessed via VNC, halted via the "shutdown" link or powered off via the "Poweroff" link.
...
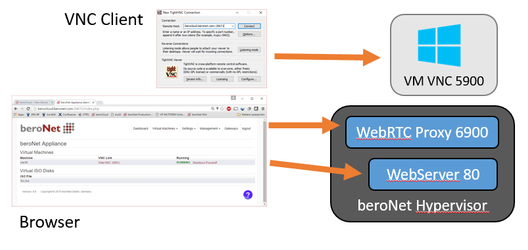
The following picture shows how a browser can use the WebVNC on port 6900 and the Webserver on port 80 and how a VNC client can directly connect to the VMs VNC Server on port 5900:

Manage VMs
Under "Virtual Machines->Manage VMs" you create new VMs, delete or rename existing ones.

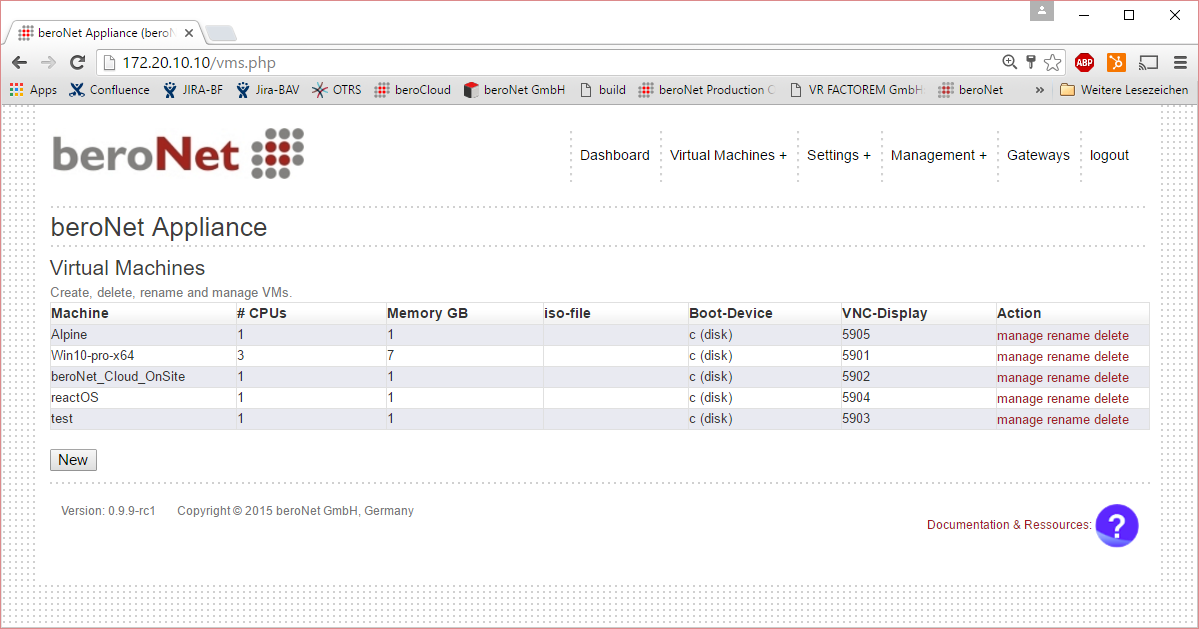
By clicking on New the VM Create wizard opens and allows to create a new vm.

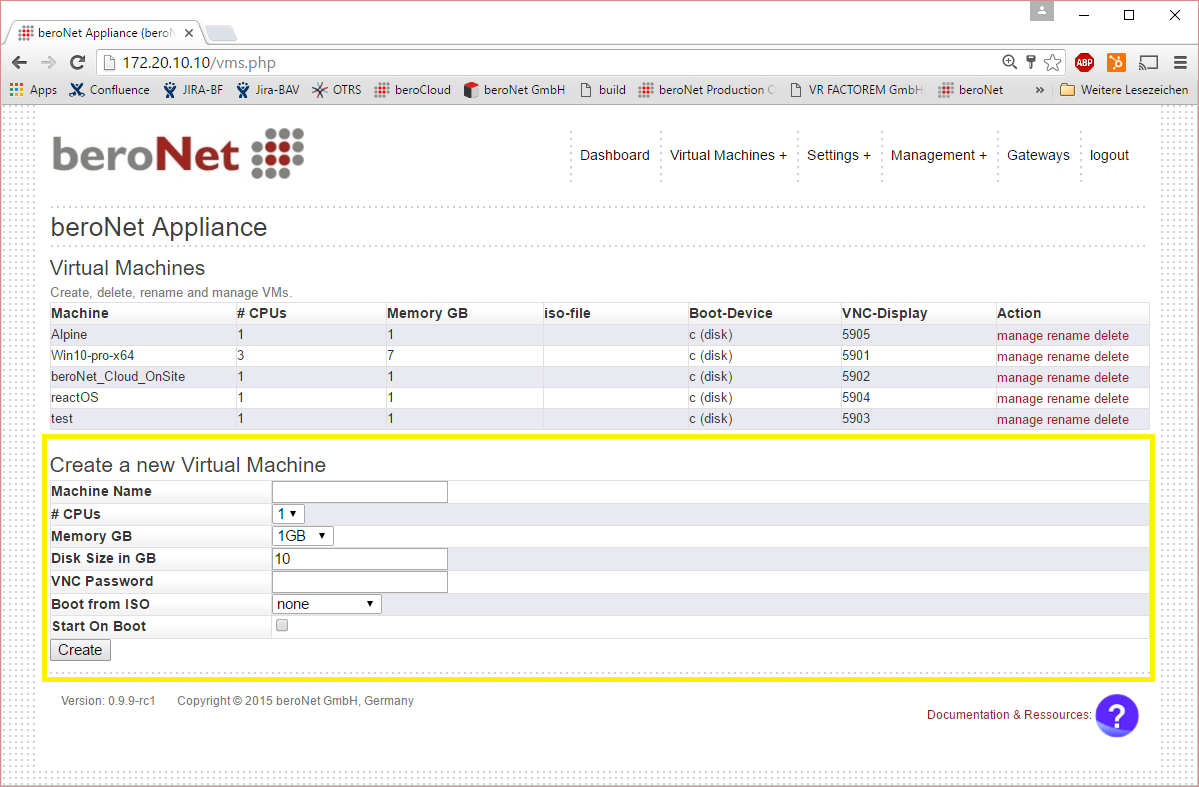
After clicking on Create you can modify the VM Details in the VM Manager.
...
- Power On / OFF
- Shutdown
- Sleep / Wakeup
- Clone

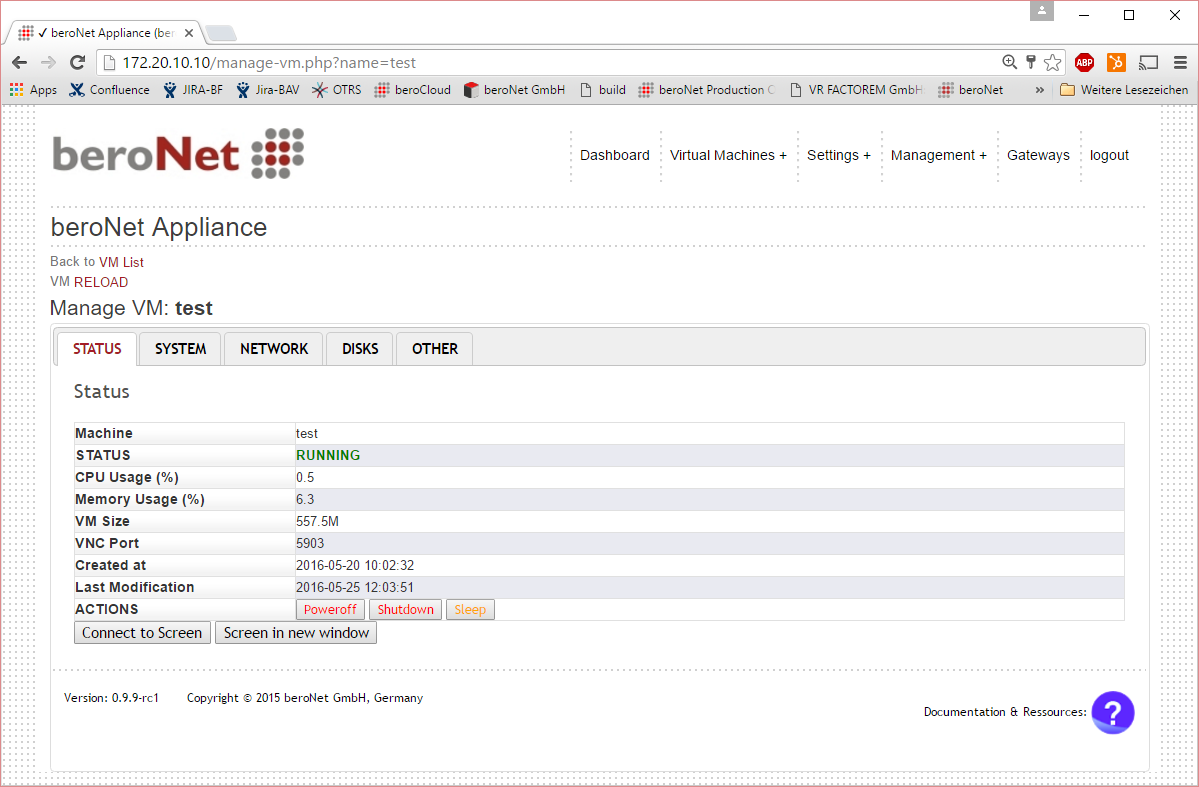
Additionally you can use the built-in WebVNC tool to connect to the console of the VM.
...
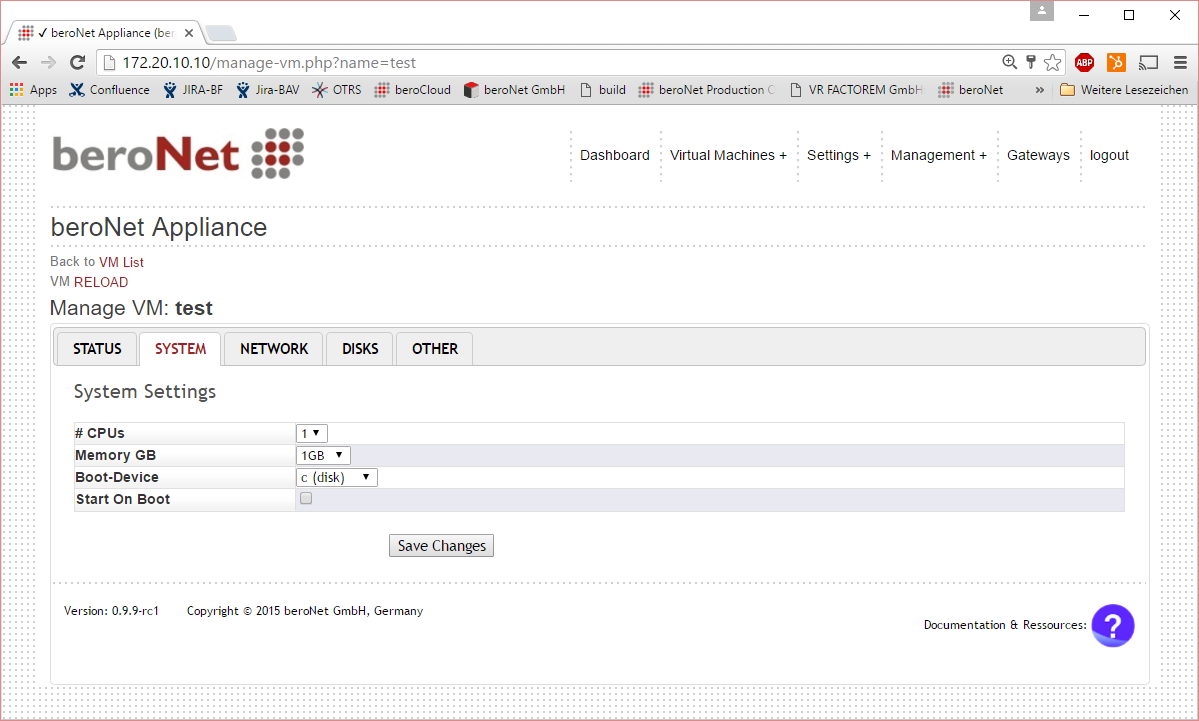
* # CPUs               - The amount of CPUs for this virtual machine, one is reserved for the Hypervisor
* Memory in GB         - The amount of memory for this VM, 1GB is reseved for the Hypervisor
* Start on boot        - defines if the VM should be started automatically during boot
* Boot-Device          - defines if the VM boots from it's virtual hard-drive or from the ISO file for installation


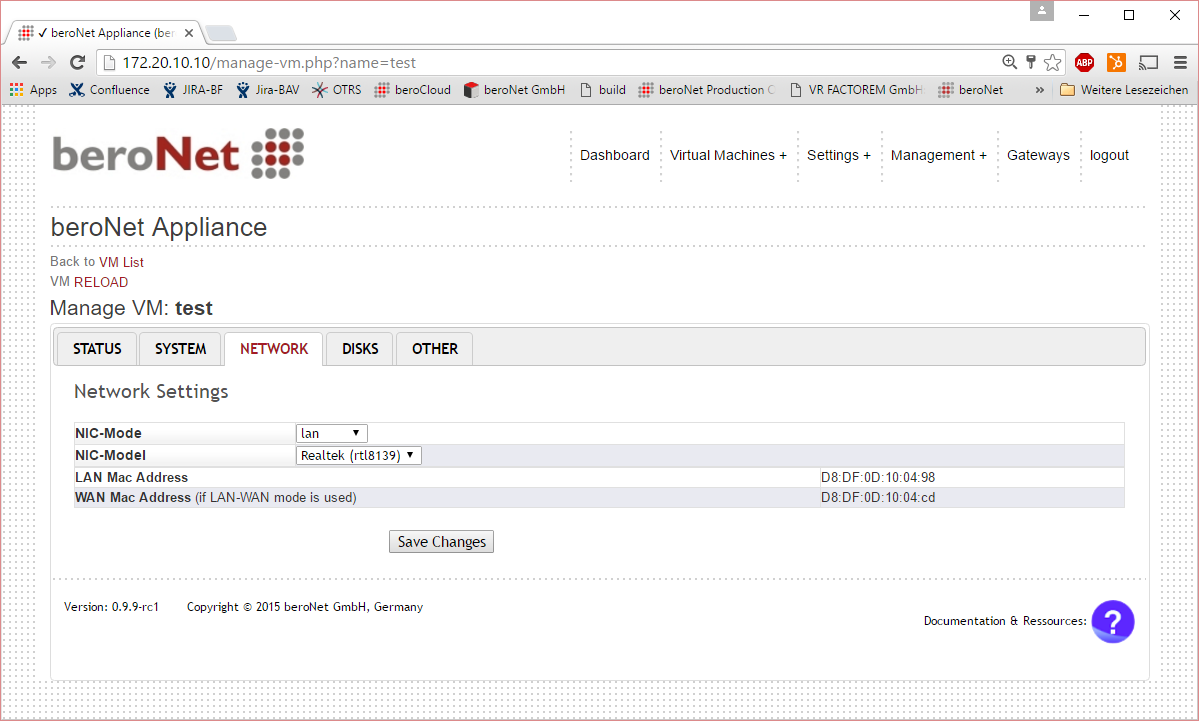
NETWORK
Under the network settings you can define:
...
Also the MAC Addresses of the VM are visible here. The WAN Mac Address is only relevant in the lan-wan mode.

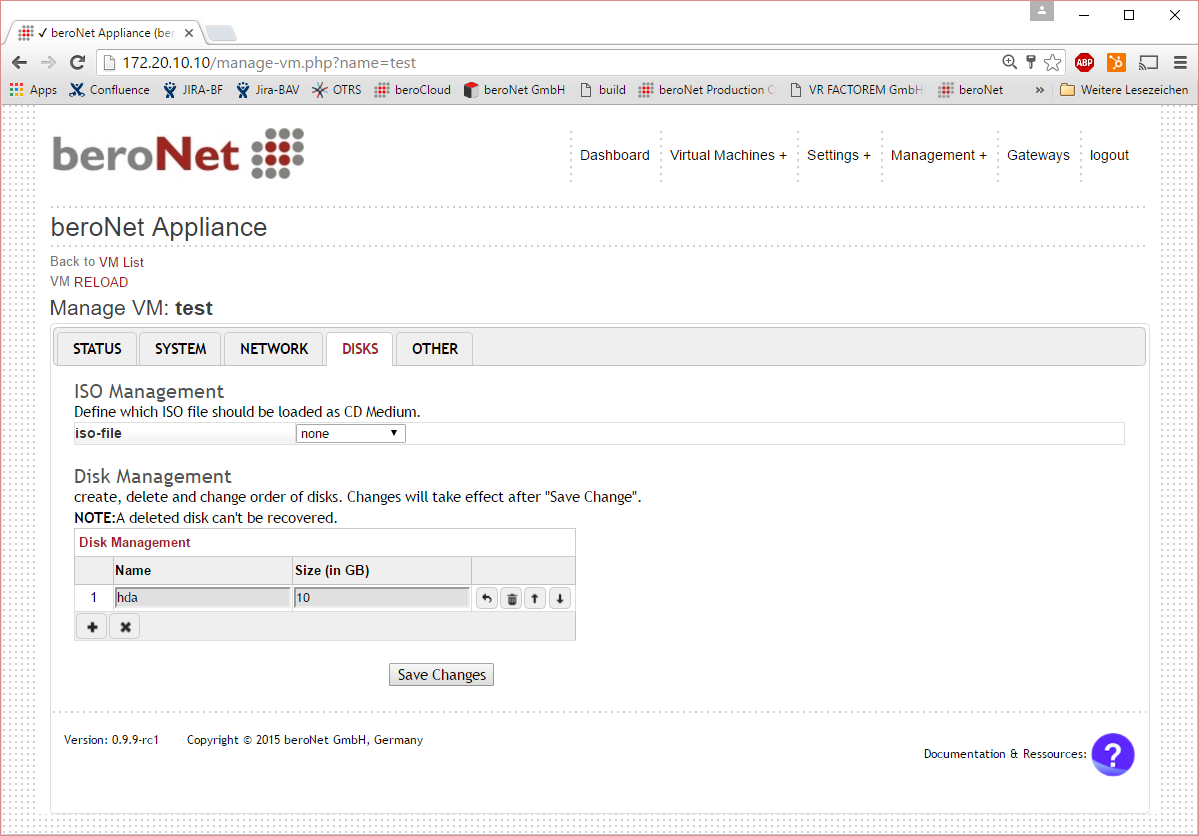
DISKS
The Disks Manager allows to create, delete and reorder virtual disks. Also It defines if an ISO Intallation Medium is inserted in the VM. NOTE: a deleted disk can not be recovered!

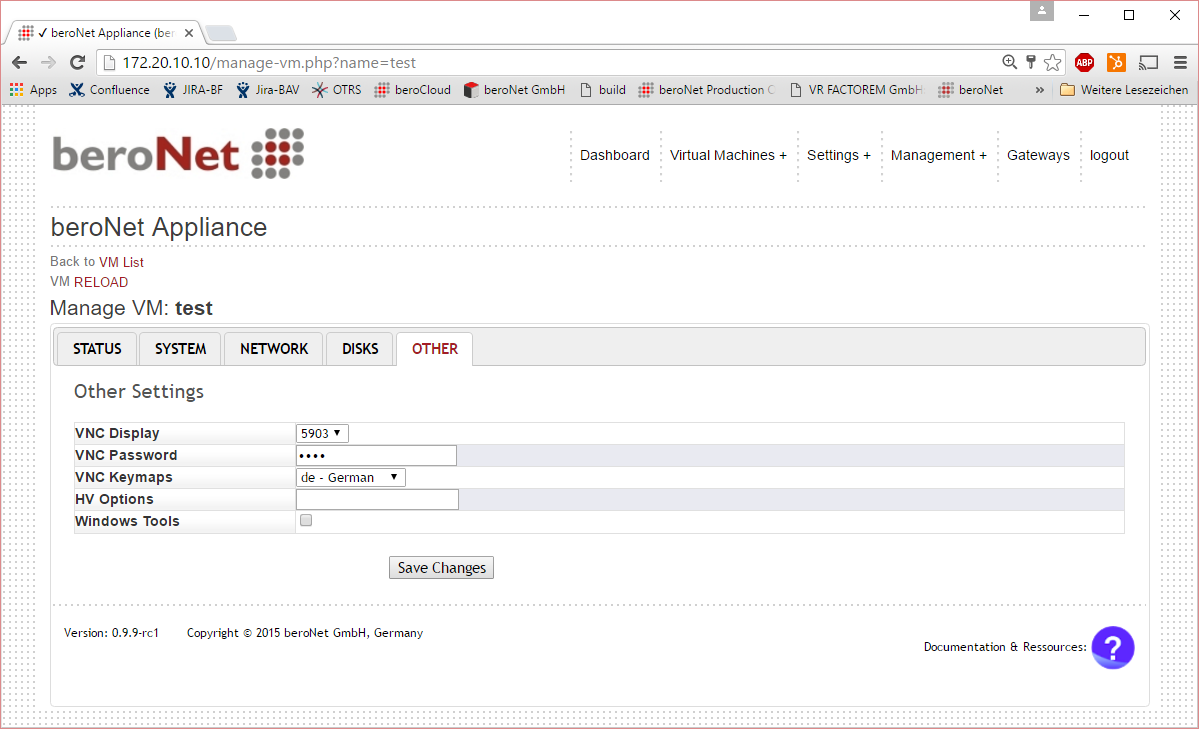
OTHER
Under other, you can mainly find the VNC and miscellaneous settings:
* VNC Display          - defines the VNC display number
* VNC Password         - defines the VNC access password
* VNC Keymap           - defines the VNC virtual Keyboard Keymap
* HV Options           - adds the possibility to add manually XEN option, for reference: xen options, multiple settings can be seperated by ; as
                         localtime=1;
* Windows-Tools        - if enabled the VM has another disk containing the PV driver for windows, which boost the performance of a windows VM (NOTE: preinstalled with the market windows images)

CLONES
If the VM has clones or is a clone, it displays a list of its clones or a link of its parent.
...
The Hypervisor can backup & restore both full VMs and ISO files. In the Backpup & Restore-Manager the attached USB drivers are displayed.

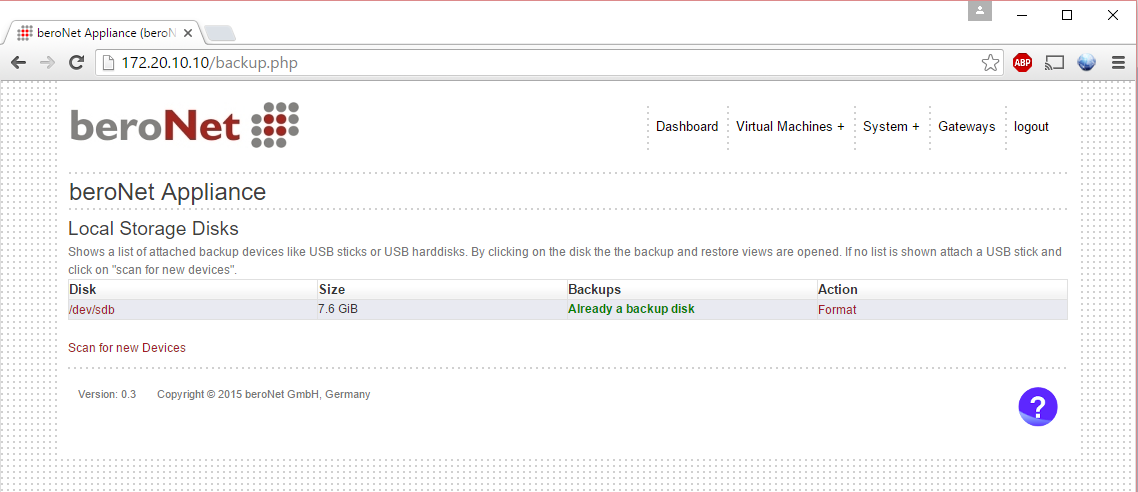
If no disk was found, attach a USB drive and click on "scan for new devices". If the drive is not yet a "backup-space" for the Hypervisor, the drive needs to be formatted as backup space.
To make a backup or restore already made backups click on the USB drive link.

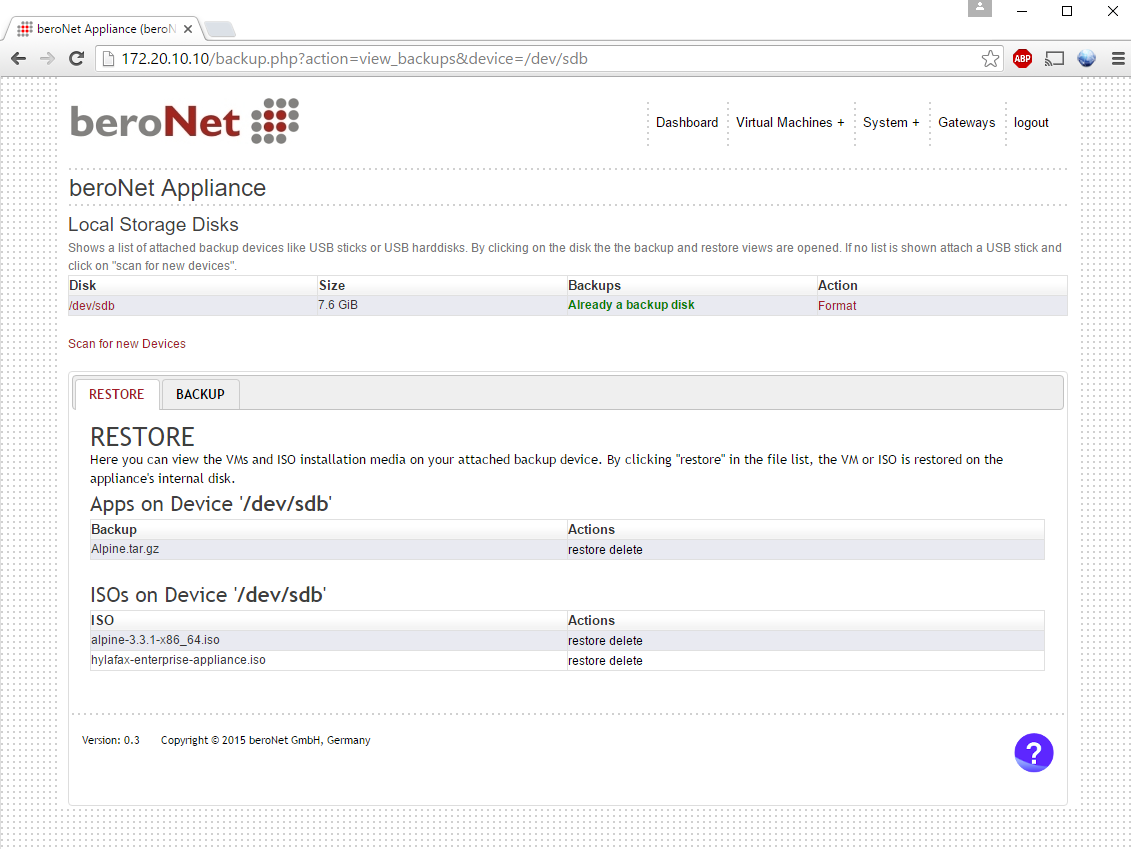
In the restore tab, previously backuped ISO files and Apps (VMs) can be restored back to the hypervisor disk. This may take several minutes and even hours depending on the file size and if the file is compressed. The backups can also be deleted here.
In the "Backup-Tab" local VMs and ISO files can be backuped. VMs can be compressed in order to save drive space.

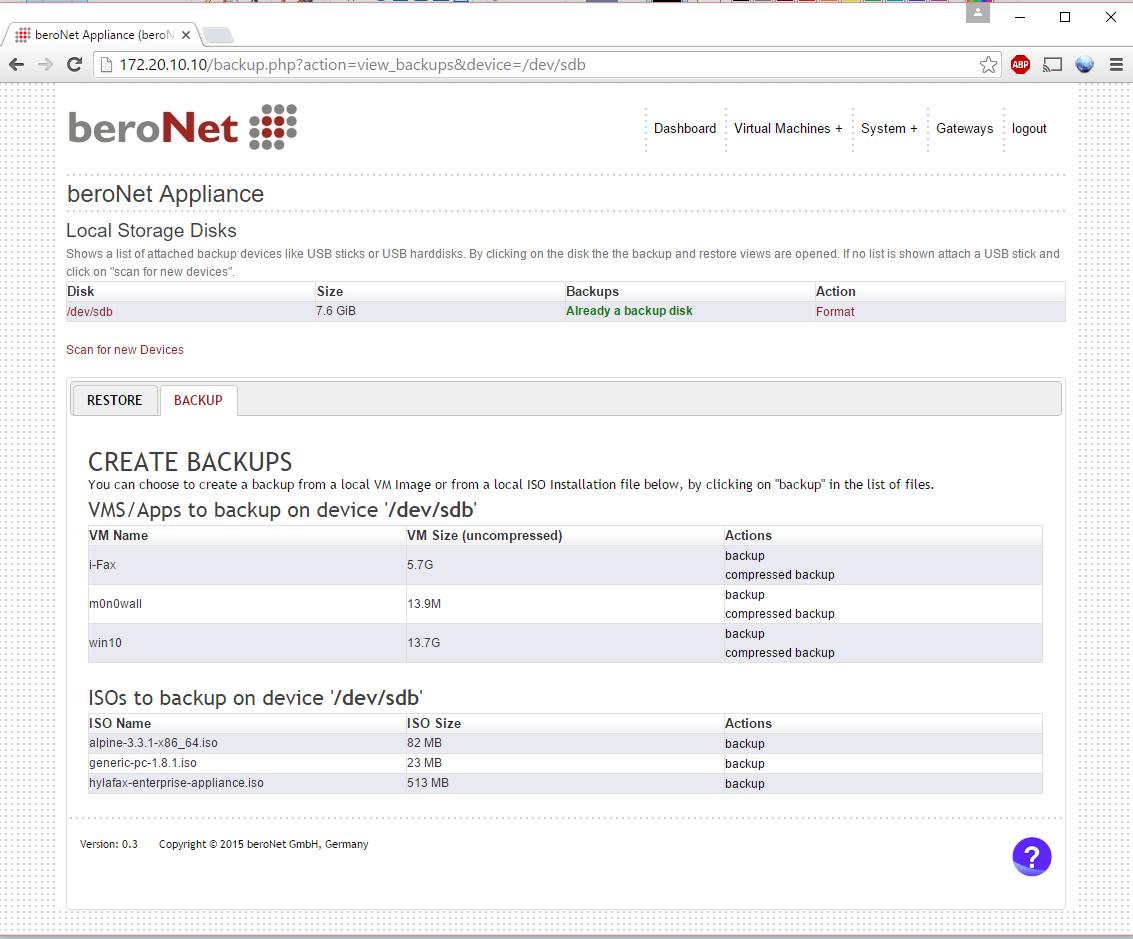
Make sure that the drive is large enough to hold a compelete VM. Creating a backup can take several minutes and even hours, depending on the filesize and wether compression is used or not.
...
The iso manager shows the lokal stored ISO files which can be used to boot a VM to install the OS provided in the ISO file (e.g. an Ubuntu ISO for installing Ubuntu in a VM). Isos can be deleted via the "delete" link.
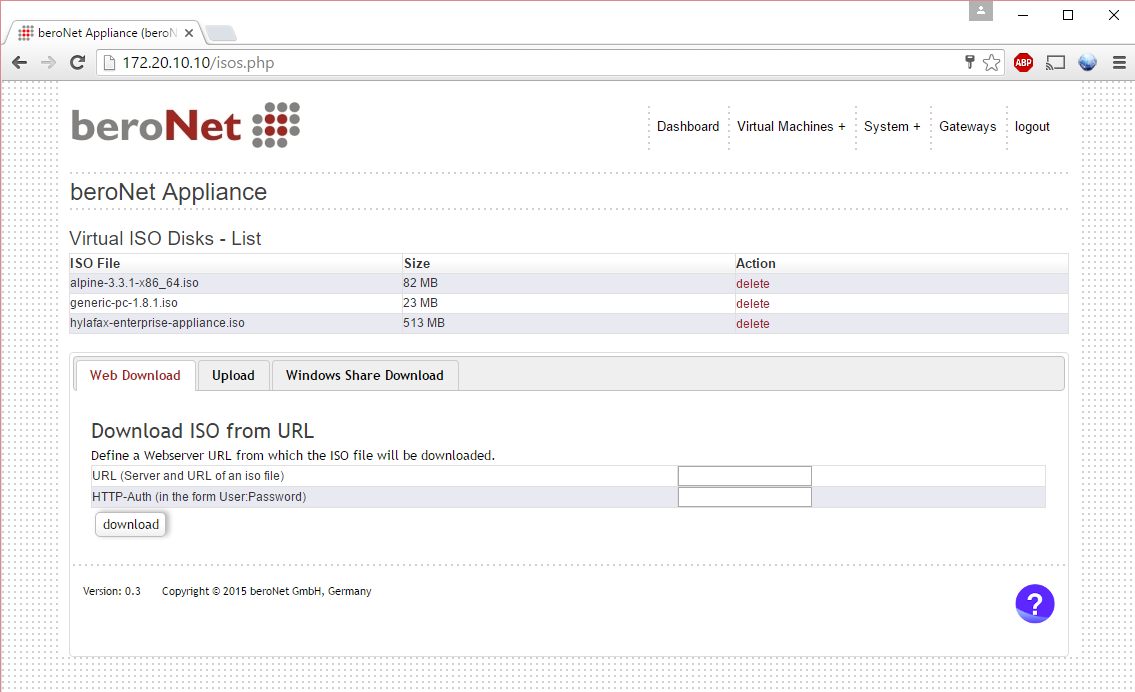
There are 3 ways to get an ISO on the appliance:
...
The beroNet Appliance Market allows it to download pre-installed Virtual Machines. These machines can be started directly in the Hypervisor. The Market also allows to donwload ISO Installation Media for setting up new Virtual Machines.

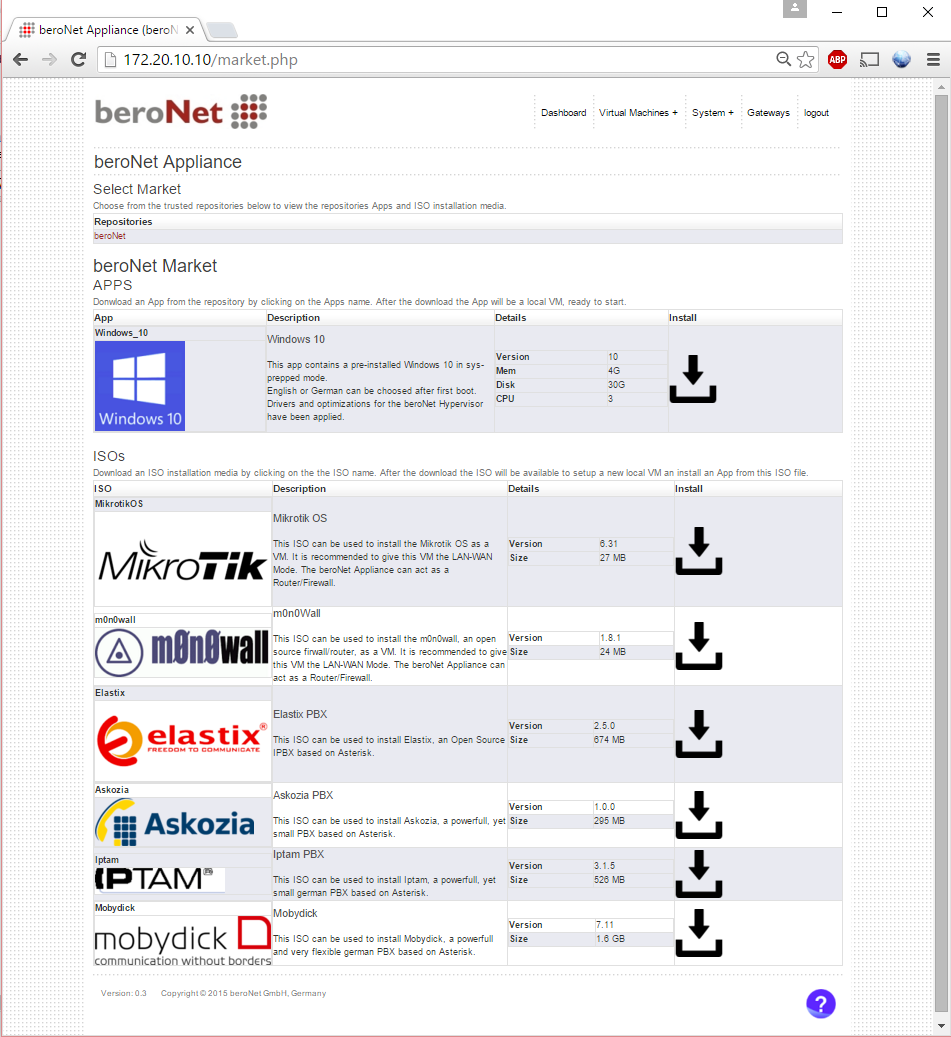
Each VM or ISO has additional Meta Information like the version and the size. By clicking the download icon the VM or ISO will be downloaded to the lokal appliance.
...
The result is a tree, like in this example:

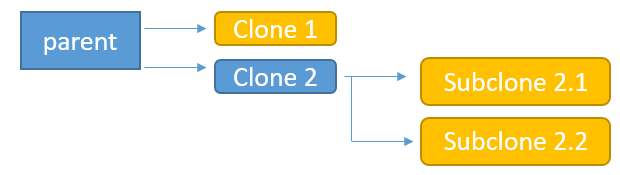
NOTE: only the orange leaves of the tree can actually run. But indeed they can run at the same time!
...
To create a clone you need to go to the VM Manager of a VM on the STATUS Tab and click on "clone" and then provide a name of the clone (You can only create clones of powered of VMs).


After that the cloned VM becomes a parent and is in the STATUS CLONED:
![]()

Also a list of all clones of this VM is displayed:

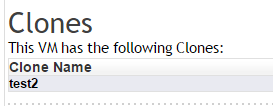
You can always create new clones from this parent VM. These clones will have the state of the parent last time it was powered off.
...
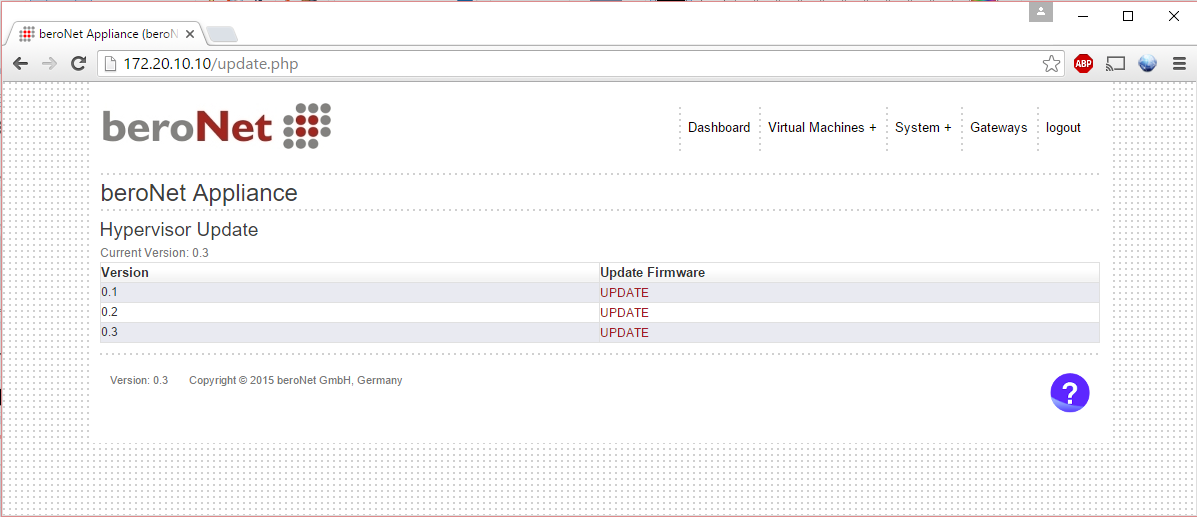
To update the hypervisor, simply click on the Version which you want to install.

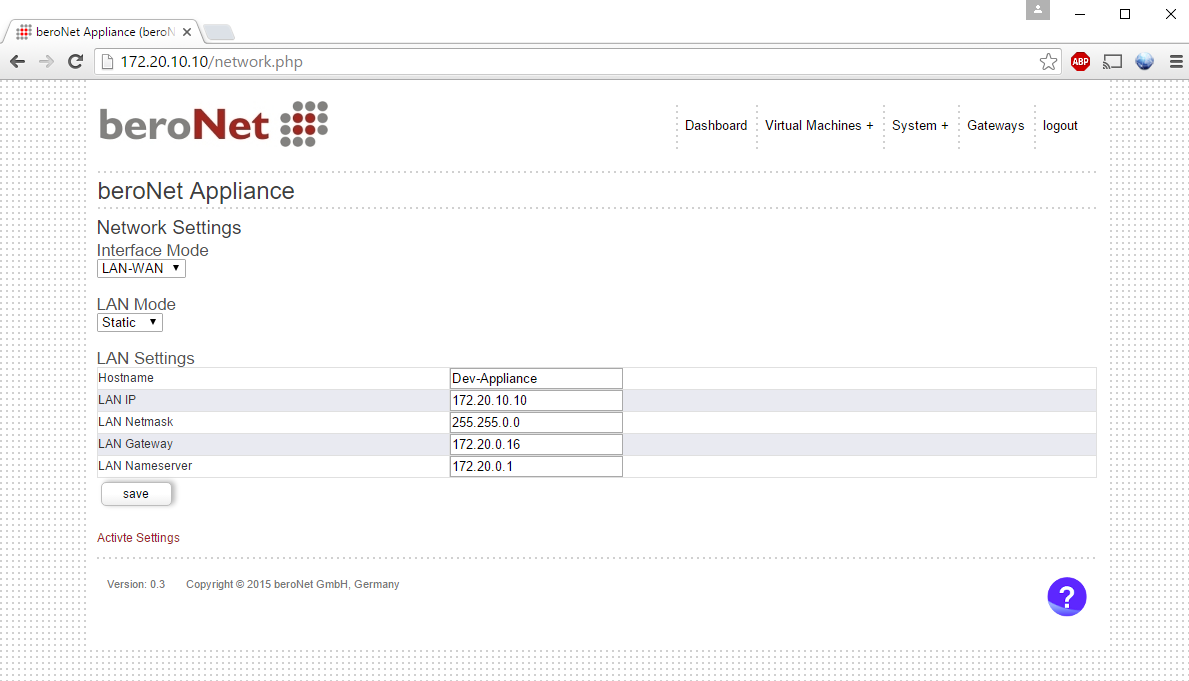
Network Settings
...
The LAN Mode can be defined as DHCP or static. If it is static the LAN Settings need to be defined. These settings do only apply to the LAN interface of the Appliance. The WAN Port however can only be controlled from within a VM which has the LAN-WAN mode enabled.

Cloud Settings
The cloud manager allows to register the appliance into the beroNet cloud or into a private beroNet cloud. After successfull registration a cloud key appears. The appliance starts communication with the beroNet cloud after enabling the cloud and after clicking "cloud enable".


NOTE: a reboot of the hypervisor might be needed to register the appliance in a different cloud'
Reboot & Halt

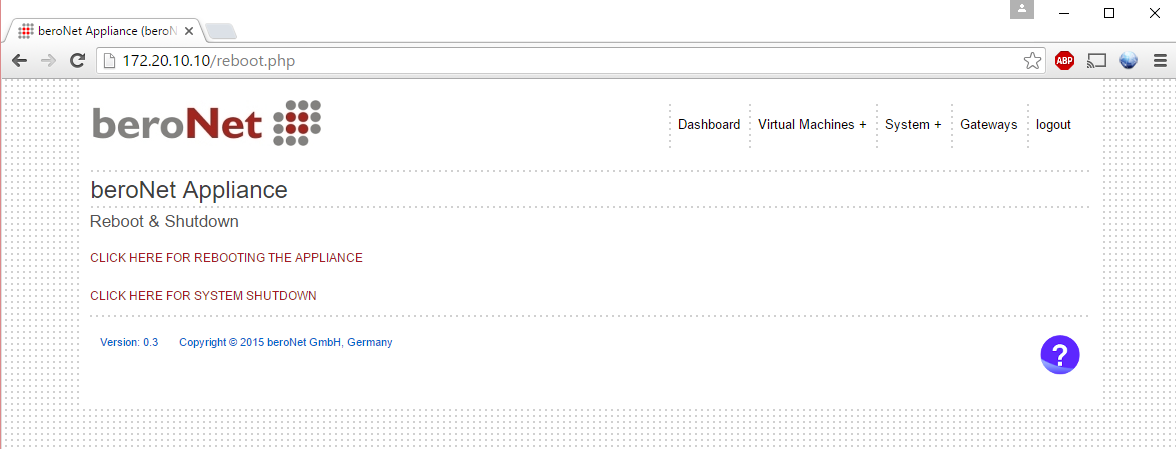
By clicking "CLICK HERE FOR REBOOTING THE APPLIANCE", the appliance does a reboot.
...
The Gateways Manager starts a bfdetect in the background and shows a list of all local appliances and Gateways with their Serials, Firmware Versions, IP Addresses and MAC Addresses.

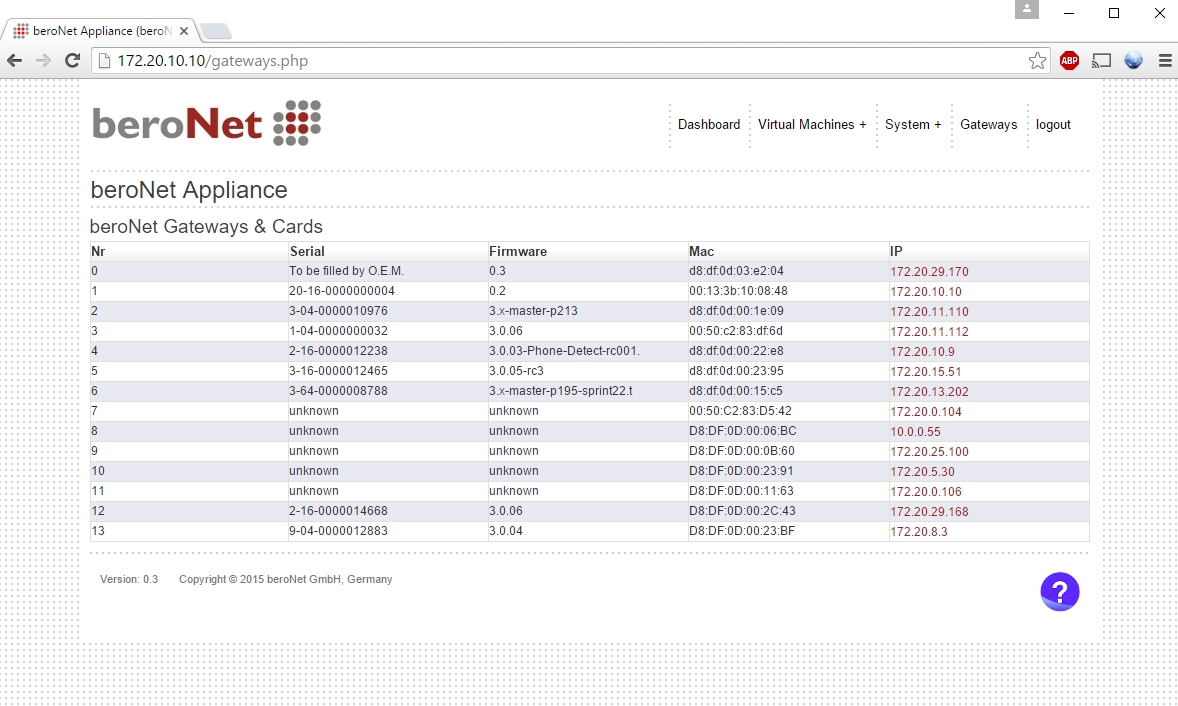
By clicking on the IP Address, the browser will be redirected to the gateway/appliance GUI.