How-To: Setting up OPNsense from scratch together with the beroNet VDSL card
Introduction
This HowTo is written for the beroNet Appliance with the Hypervisor Version 2.03 and the Opnsense Version 18.1.6.
It explains how to setup the DSL Card, create an OPNSense VM from the Installer ISO file and configure the OPNSense to use the DSL Card as WAN Interface.
DSL Card Setup
When your appliance includes a DSL Card it will appear under "Devices"→Manage DSL Card:
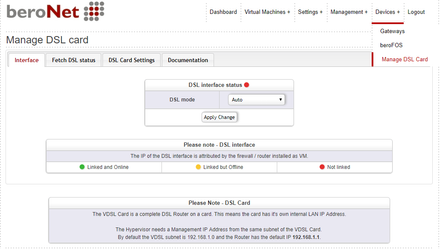
The first page load takes a few minutes, as the DSL card receives the latest firmware.
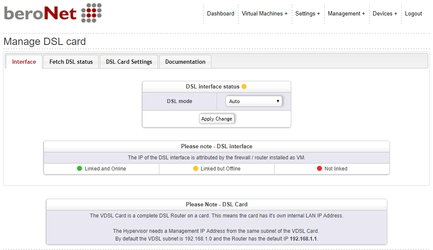
After plugging in the DSL cable, the "DSL" Led should start blinking and finally stay green. And the GUI should show that the DSL Interface status is Linked:
Download the ISO
Find the latest OpnSense ISO Link via an OpnSense Mirror:
e.g. for the Version 18.1.6 copy the Link to the DVD Version of opensense:
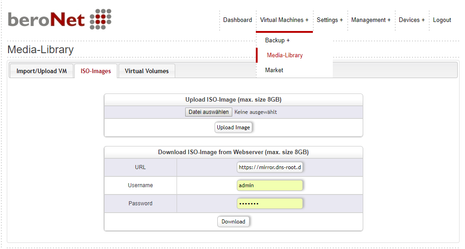
https://mirror.dns-root.de/opnsense/releases/18.1/OPNsense-18.1.6-OpenSSL-dvd-amd64.iso
and fill it in the "URL" field under "Virtual Machines" → Media-Library → ISO Images
then click download:
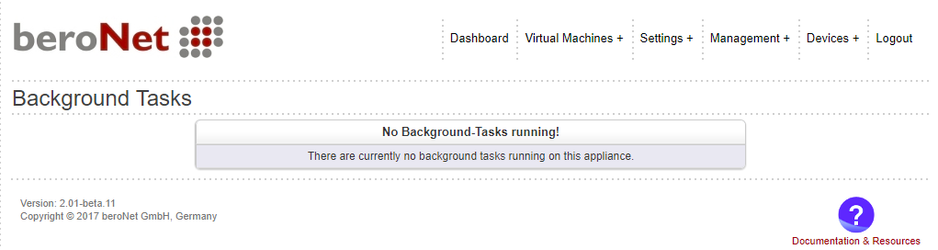
The download begins and a Link "Background Tasks" is shown. Click on that link and you will see the current download state:
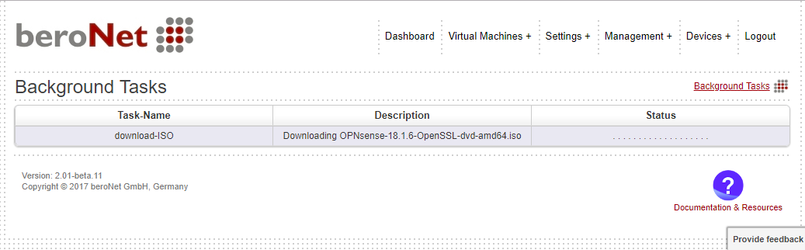
When the download has finished the Background Tasks List ist empty:
Create the VM
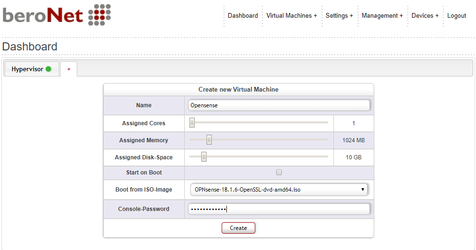
Create a new Virtual Machine for the OPNSense Router by going to the "Dashboard" and clicking on "+".
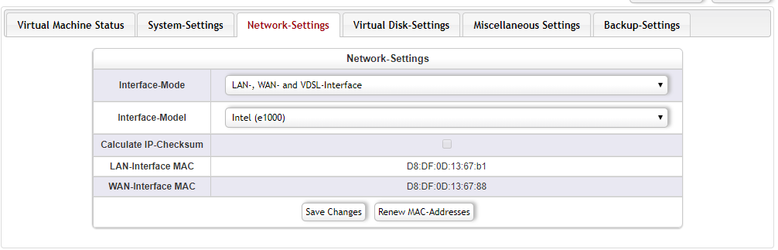
Go to the Network-Settings of the VM and choose the "Interface Mode" = "LAN,WAN, VDSL Interface" and save the settings:
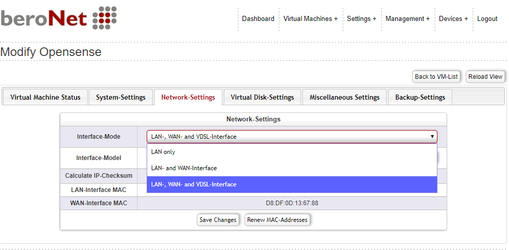
This will make sure that this Virtual Machine will get 3 Virtual Interfaces:
- LAN - will be bridged with the physical LAN Port
- WAN - will be bridged with the second physical LAN Port on the Mainboard (WAN)
- VDSL - will be bridged with the VDSL Card.
Go to Virtual Machine Status and click on "Start".
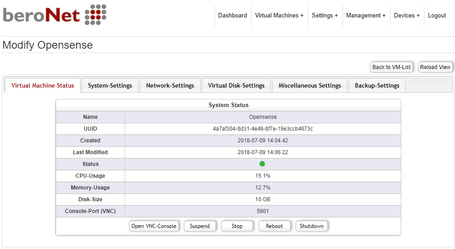
Now you can click on "Open VNC Console" to see the VGA screen of the VM.
Start the OpnSense Installation
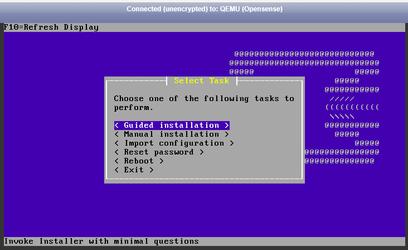
The initial boot takes a few minutes until you reach the following screen:

login to the opnsense installer with the following credentials:
default user: "installer", pw: "opnsense"
more infos here: https://docs.opnsense.org/manual/install.html
Now click enter until you reach the following screen, where you need to choose "Guided Installation":
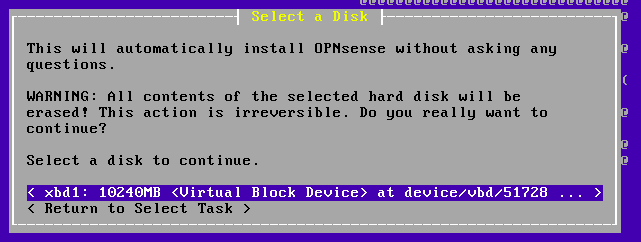
Choose the Virtual Disk and click enter:
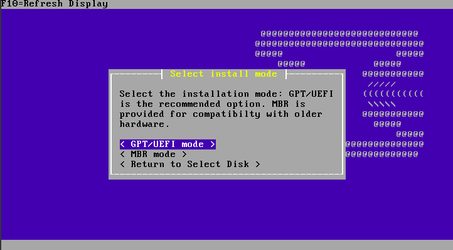
Choose UEFI Mode and click enter:
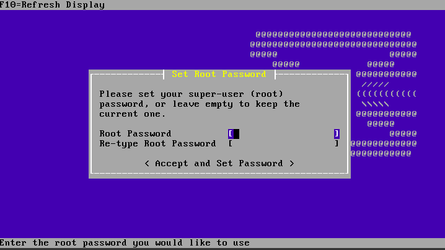
choose a password and retype it:
click reboot and enter:

After the VNC Console shuts off, go back to the Hypervisor GUI and turn off the VM by "Virtual Machine Status"→Stop

Change the Boot Device
Now remove the Virtual ISO Disk under "Virtual Disk Settings" → "Loaded Iso Image" and choose "none":
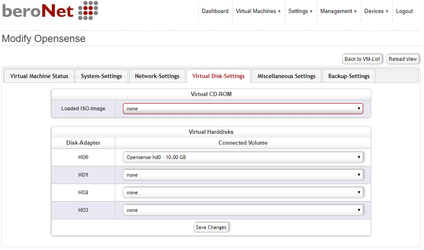
Now change the Boot Device under "System Settings"→ "Boot Device" to "C":
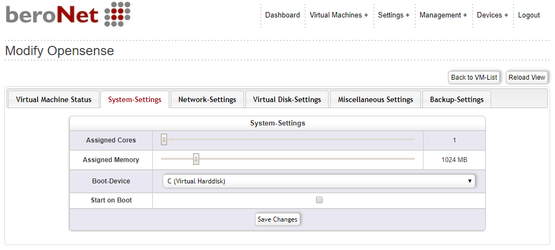
Click on Save and start the VM again.
NOTE: By default opnsense will take the IP: 192.168.1.1
NOTE: The Boot-Up takes a few minutes always.
Initial OPNsense Configuration
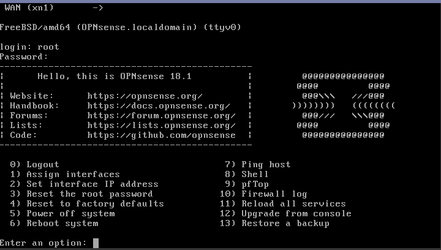
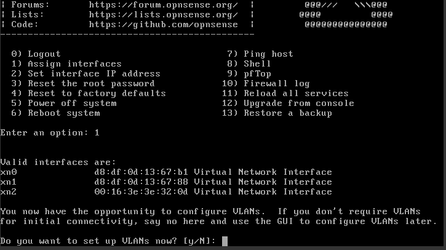
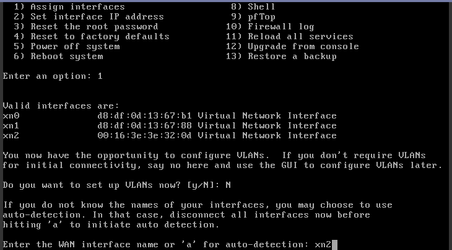
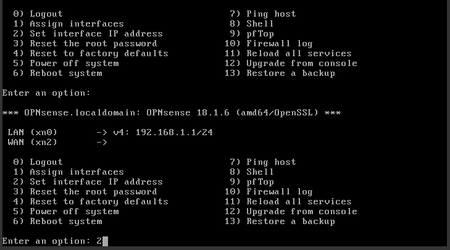
When OPNSense starts it does not know how to assign the Virtual Network Interfaces provided by the Hypervisor, so press 1) to assign the interfaces:
Press "N" to not setup VLANs now (unless you really need them during installation):
Find the VMs LAN Interface by clicking in the Hypervisor GUI on "Network Settings":
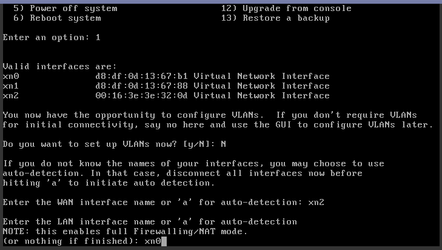
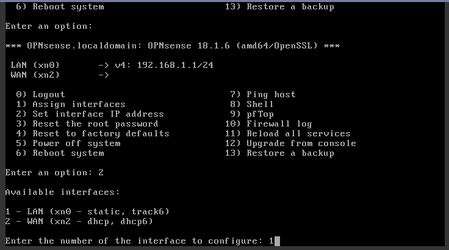
OPNsense shows you 3 Interfaces (when you have a DSL Card installed), The DSL Card should be the WAN Interface so enter xn2:
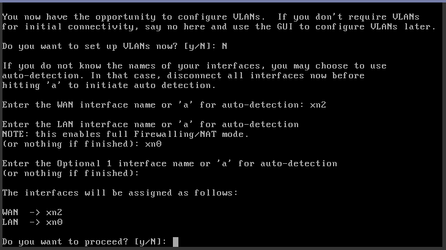
The LAN Interface is the first Virtual Network interface, so enter xn0:
press enter to not add an Optional Interface for now and proceed with "y":
Back on the initial screen press 2) to configure the IP Address (which by default is 192.168.1.1):
Now choose the LAN interface by pressing 1):
Now you can assign an IP Address, set the Network Mask and make sure to enable or disable the DHCP Server based on your requirements. Afterwards you can browse to the OPNSense GUI and finish the configuraion.
OPNsense DSL Settings
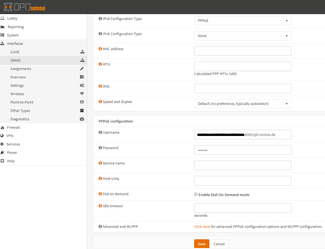
If you have assigned the virtual network interfaces in the console, you should have 2 Interfaces in OPNSense: LAN and WAN. The WAN Interfaces is bridged with the VDSL Modem. So we need to choose "pppoe" for the IPv4 Configuration type setting. Then we need to provide a Username and Passwort in the PPPoE configurations section, please consult your DSL provider to retrieve these information, then click save and afterwards apply settings:
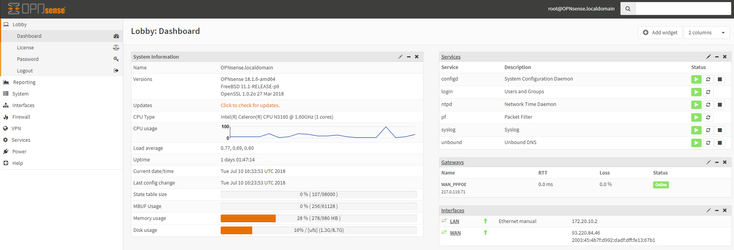
After a few minutes the Dashboard of OPNsense should show a Link on the WAN Interface and the public IP address that has been assigned:
Finally you can assign the OPNsense as a Gateway to one of your computers and test if the internet connection works.
If you need scheduled remote assistance, you can request our on-demand support services: https://www.beronet.com/support