In order to connect analog devices to a 3CX, it is necessary to use an FXS Gateway. In order to configure analog devices as internal extension of the IPBX, we need to follow 3 steps for each device:
- Create an extension in the IPBX
- Create a corresponding SIP trunk in the gateway
- Configure a FXS port in the gateway
- Create two dial plan rules in the gateway: from analog to SIP and from SIP to analog
For a few devices, a manual configuration can be done. For 10 or more devices, such a configuration can take time. We therefore created a wizard enabling a very quick configuration.
- Create and export the extension created in the IPBX
This step still needs to be done. Create as many extensions as there are analog devices.There usually is a way to export those extensions. In 3CX, simply click on export. Choose the .csv option.
2. Choose the right information in the .csv file
To import those information in the gateway, we only need to keep the username and the password. We then need to add to which port of the gateway those extensions will be connected to (up to 16 FXS port in a beroNet VoIP gateway).
The .csv from 3CX has lots of information that the gateway does not need for its configuration:
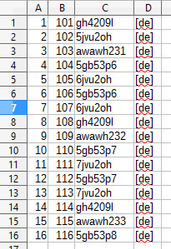
For the configuration of the gateway, we need the usernames and passwords of the extensions. We will precise to which port they belong to and which toneset we want to use. The .csv file looks like below:
In column A the ports of the gateway are listed. In my case, I have a 16 FXS Gateway
In column B I entered the usernames of the extensions
In column C the passwords of the extensions and in column D the tone sets we want to use.
3. Start the beroNet wizard
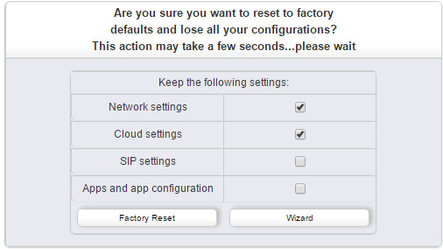
To start the wizard, either click on "easy configuration wizard" on the WEB Interface or go to "reboot/reset" under "management+" and click on "wizard":
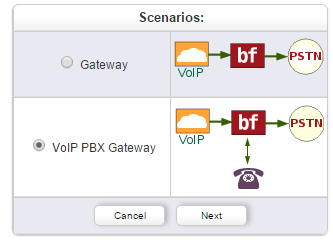
Choose the scenario "VoIP PBX Gateway" and click next
In "VoIP PBX Settings" you need to enter the IP address of the IPBX in the "Server Address" field and the port used in "Port" (usually 5060):
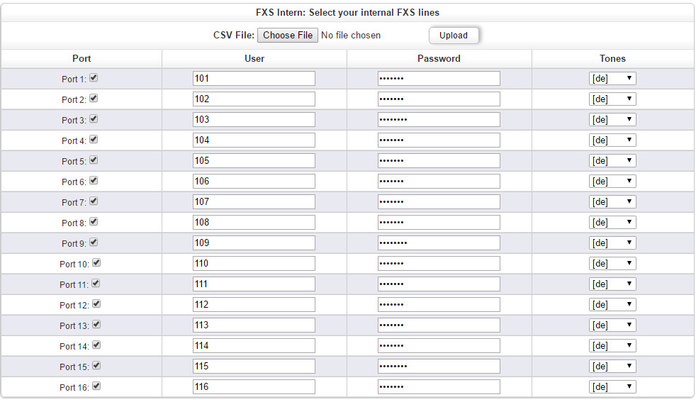
We can then upload the .csv file and upload its content. Click on "Choose File", select the right .csv file modified for the gateway and upload it.
The configuration should then look like follow (depending on your .csv file):
Finally, save and activate the configuration. When the gateway reboots, FXS ports, SIP trunks and dial plan rules should be created and the different analog phone users should be able to call each other.
Here is an example of the .csv file: extensions_Gateway.csv


