In the following chapters we will show you how to configure a generic SIP trunk to our beroNet VoIP-Gateway. The beroNet Gateway should have installed at least firmware version 16.15.
In this example we assume that an ISDN-PBX with PRI or BRI interfaces is connected to our gateway on the one site and on the other site we are going to connect the gateway to a SIP-Trunk, in this case Easybell.
Configuration Steps:
- Hardware Settings
- ISDN Portgroup configuration
- General SIP Settings
- Create a SIP Account
- Dialplan configuration
Connection Settings SIP Trunk
Die wichtigsten Anschluss-Parameter des easybell SIP Trunks sind können über das easybell Portal abgerufen werden und sind folgende:
- SIP-Account Username
- SIP - Password
- SIP Registrar / Proxy / Domäne
- SIP Transport-Protocol is UDP
SIP General Settings
Under the menu "SIP General Options" you can modify general SIP-Account Settings. The default configuration is as follows:
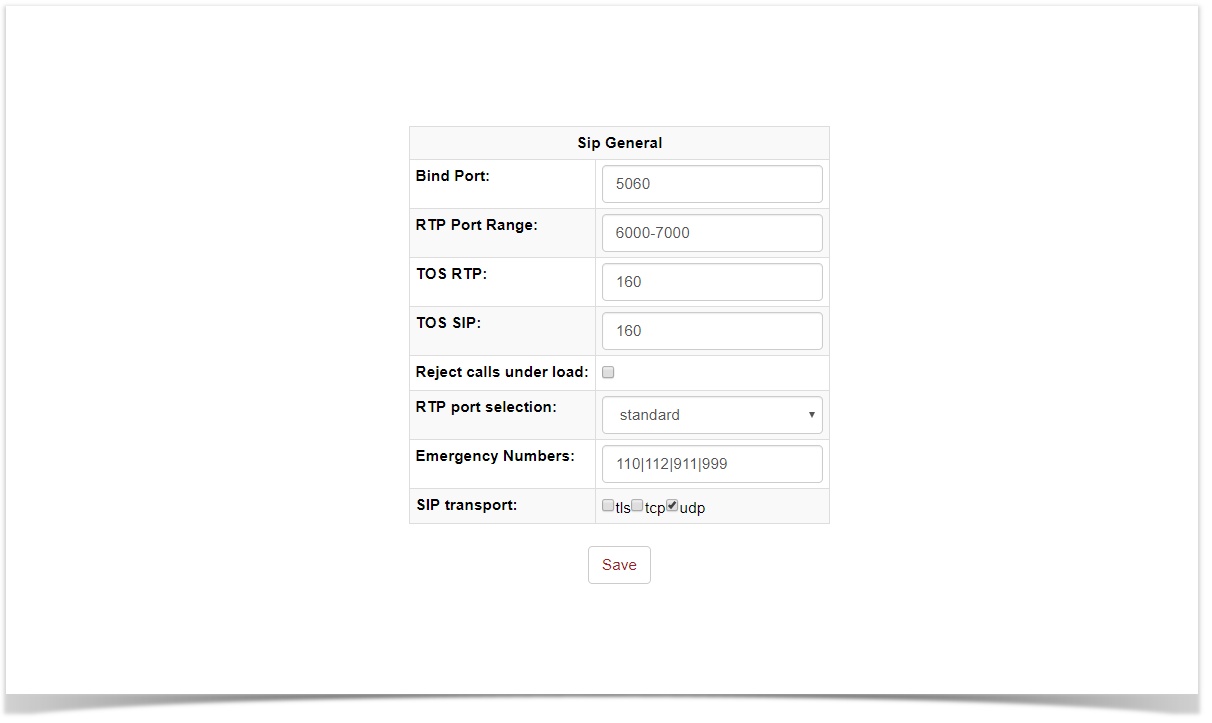
Depending on how/where you are going to use the beroNet gateway, you will need to add "port forwarding rules" on your Route for the SIP Bindport 5090 and the Audion RTP Range 6000-7000.
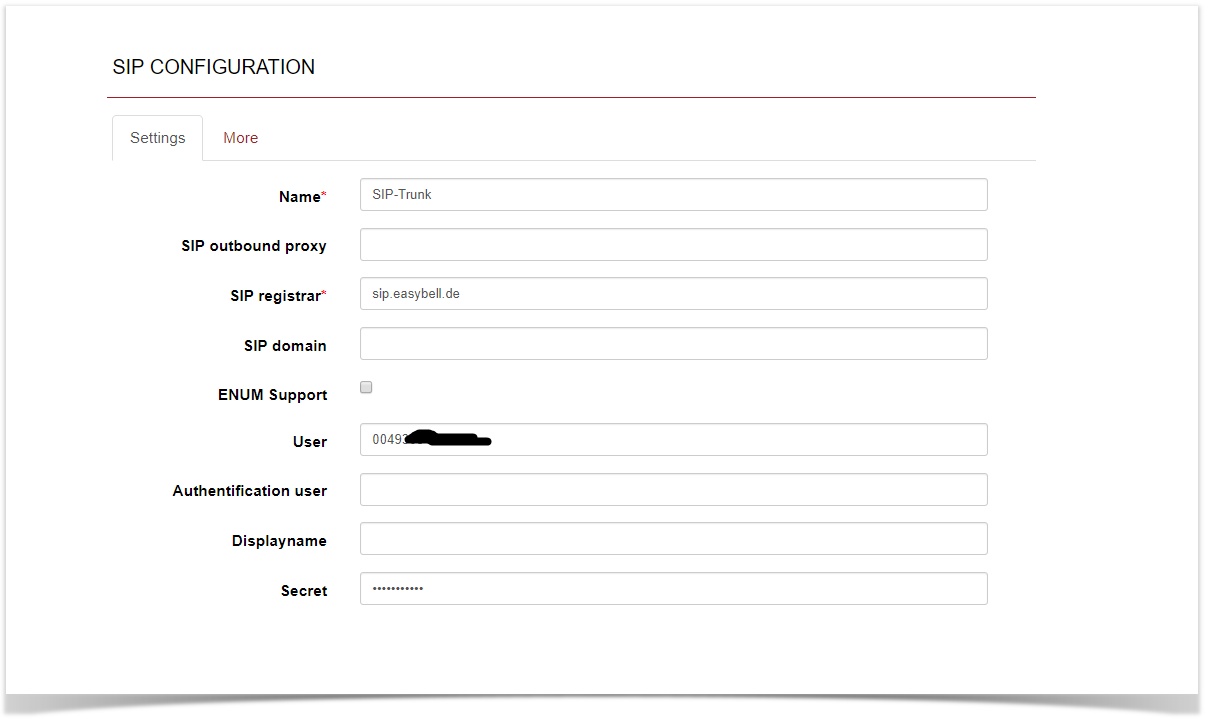
SIP Account
Under the menu SIP → SIP you can create a new SIP Trunk.The following settings are made for a SIP Trunk from easybell, please contact your provider for the corresponding settings
- SIP outbound proxy = sip.easybell.de (optional )
- SIP registrar = sip.easybell.de
- SIP domain = sip.easybell.de(optional)
- User (Account specific more infos on the easybell Portal)
- Secret (Account specific more infos on the easybell Portal)
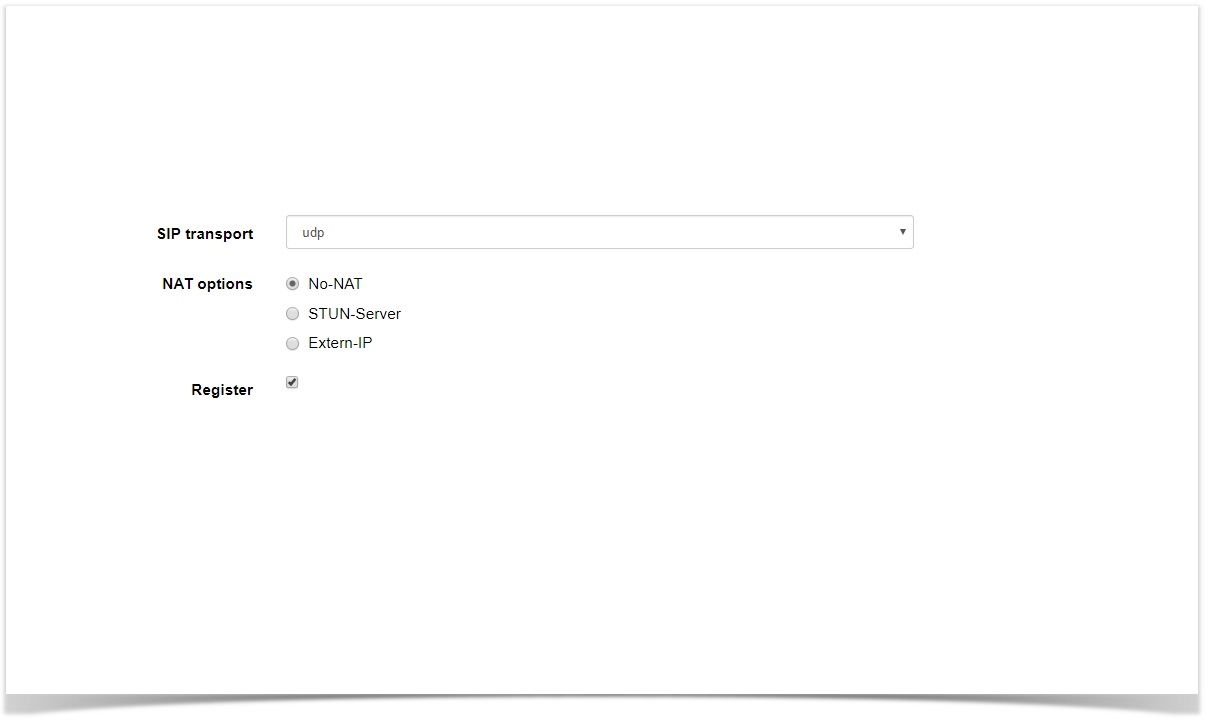
Below under SIP Configuration you will find this section. Set Register to yes.otherwise we will not registering to your provider and using proxy mode.
- Register = yes
Advanced SIP account Settings
Under the menu "more" you don't have to change anything because the default settings of the gateway are ok. Nevertheless I will explain some settings because they are important to understand if something has to be changed.
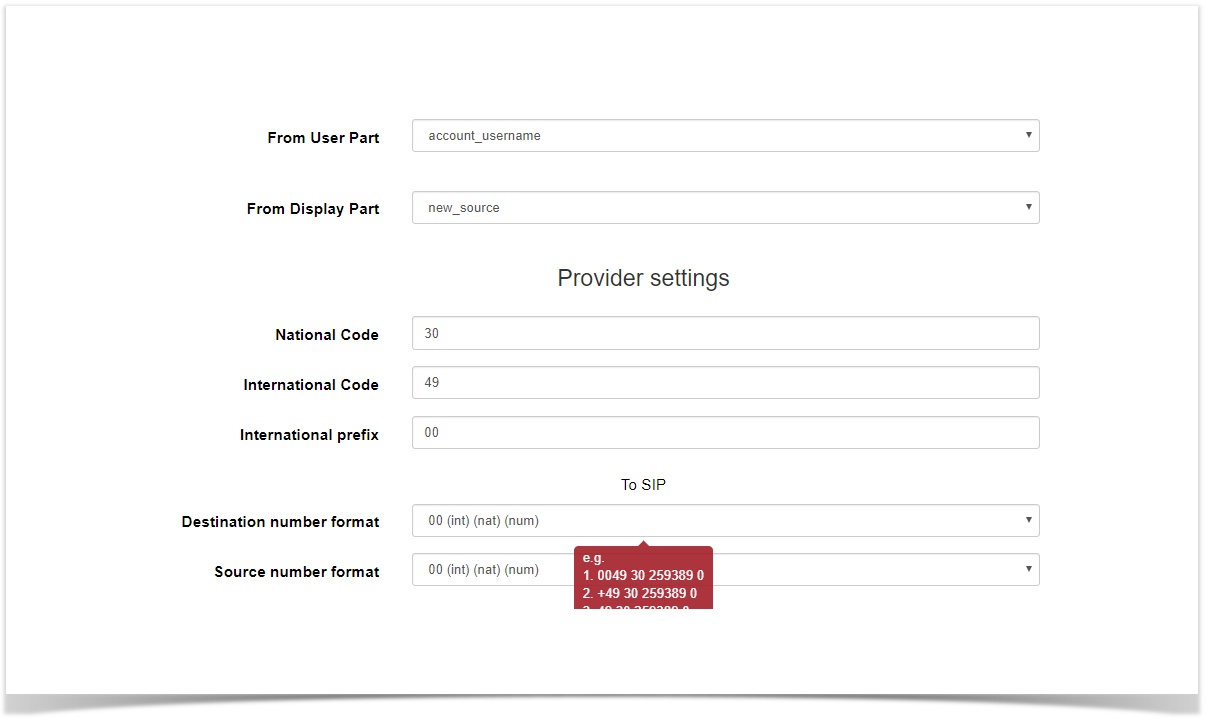
The SIP-Header "From-Display" should contain the outgoing CalledID and has to be changed to "new_source" while the From_User_Part has to be changed to account_username.
From User Part = account_username
From Display Part = new_source
Dialplan_Source is set by default to from_display and don't have to be changed.
Dialplan_Source = from_display
Finally we have to set the Country and City Code, as well as the International prefix, for instance the settings for Germany Berlin are:
- International Code: 49 (without trailing 00)
- National Code: 30 (without trailing 0)
- International prefix 00
Furthermore you can choose the Destination and Source Number Format. Deafult is 00 (int) (nat) (num)
beroNet Gateway Konfiguration
Hardware Einstellungen
Die Hardware Einstellungen finden sich in der Oberfläche unter "Hardware". Zunächst muss hier der S2M Port auf den Modus "NT" gestellt werden (dies gilt auch für S0 Anschlüsse):

Der Clock mode sollte auf "Internal Crystal" stehen. Die restlichen Parameter sollten den vorgegebenen Wert behalten.
ISDN Gruppen Konfigurieren
In der Weboberfläche unter "PSTN→ ISDN PRI" lassen sich die ISDN Gruppen konfigurieren. Hier muss man eine ISDN Gruppe für den S2M Port anlegen. Der Gruppenname ist frei wählbar, kann aber der leichteren Zuordnung wegen "TK-Anlage" heißen. Als Port wählt man die ISDN Ports die mit der TK-Anlage verbunden sind aus.
Nun muss man noch den Country und City Code definieren, also z.b. für Berlin:
- Country Code: 0049
- City Code: 030
Die restlichen Parameter spielen für dieses Scenario keine Rolle.
Dialplan einrichten
Der Dialplan verschaltet die ISDN Gruppen mit den SIP Konten, er wird unter "Dialplan" in der Oberfläche konfiguriert. Für den Betrieb der TK-Anlage am easybell SIP-Trunk sind nur 2 Dialplan Einträge nötig:

Leistungsmerkmale
FAX
Die easybell unterstützt sowohl Fax über G711, als auch T.38. Beide Varianten funktionieren bei genügend Bandbreite ausreichend stabil um wenigstens 20 Seiten Text und Bilder sauber zu übertragen.
CLIP / CLIP No Screening
Die CLIP wird bei der easybell aus den SIP Headern standardmäßig aus dem From Display Part ausgelesen. Dies können Sie aber im easybell Portal entsprechend einstellen in welchen Feld die ClIP übertragen werden soll.

CLIR
Um CLIR in Richtung des easybell SIP-Trunks zu benutzen muss eine *31* vor der Rufnummer die Sie erreichen wollen gewählt werden um die fallweise Rufnummernunterdrückung zu erreichen. Hierzu muss die unter TO-SIP das
Destination number format auf unknown gestellt werden, anders als weiter oben beschrieben auf 00 (int) (nat) (num).