How to configure a beroNet Gateway with 3CX V15
- Jean-Eudes (Unlicensed)
- Jeff Stahlnecker (Unlicensed)
The web interface of 3CX 15 is a bit different than version 14 but the configuration of a beroNet gateway with the IPBX is very similar.
Find out the IP of your Gateway
First things first: you need to find out the IP address of your gateway that you plugged to your LAN. To do so, run bfdetect. It enables you to find all beroNet devices on your network.
You can also use bfdetect to set a fixed IP address on your gateway (which is recommended).
Add a Gateway in 3CX
On the left part of the 3CX web interface, click on "SIP Trunks".
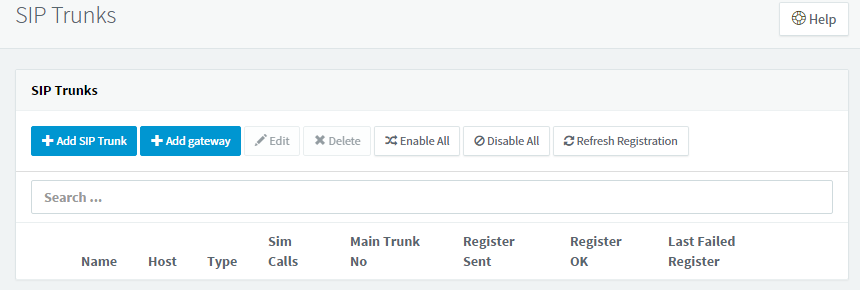
Click on "+Add gateway"
The following window appears:
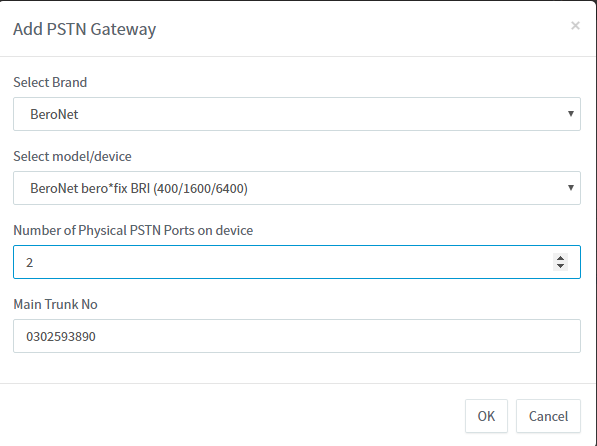
As brand, leave beroNet, select the device that you have:
- You can use BRI for the following references: BFSB1S0, BFSB2S0, BFSB2HY, and BF400Box with BRI or hybrid modules;
- You can use FXO for the following references: BFSB4XO, BF4004FXObox and for GSM Gateways
- You can use PRI for the following references: BF400box, BF1600box or BF6400box with 1 or 2 PRI
Enter you main number in the text block "Main Trunk No".
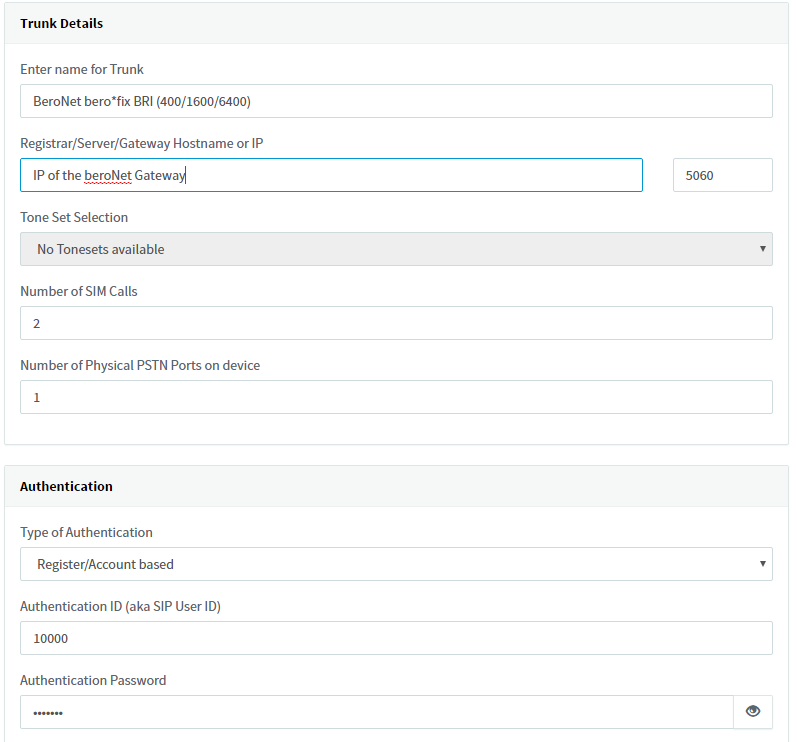
Configure the SIP connection
On the page that appears after, you can create the SIP connection between the 3CX and the gateway. A few important information need to be entered:
- "Registrar/Server/Gateway Hostname or IP": You need to enter here the IP adresse of your beroNet Gateway
- "Number of SIM Calls": the number of simultaneous calls you can do via the gateway: 2 for 1 BRI port, 1 for 1 FXO port and 30 for 1 PRI port.
- "Authentification ID" is what we call "user" in the beroNet web interface
- "Authentification Password" is what we call "secret" in the beroNet web interface
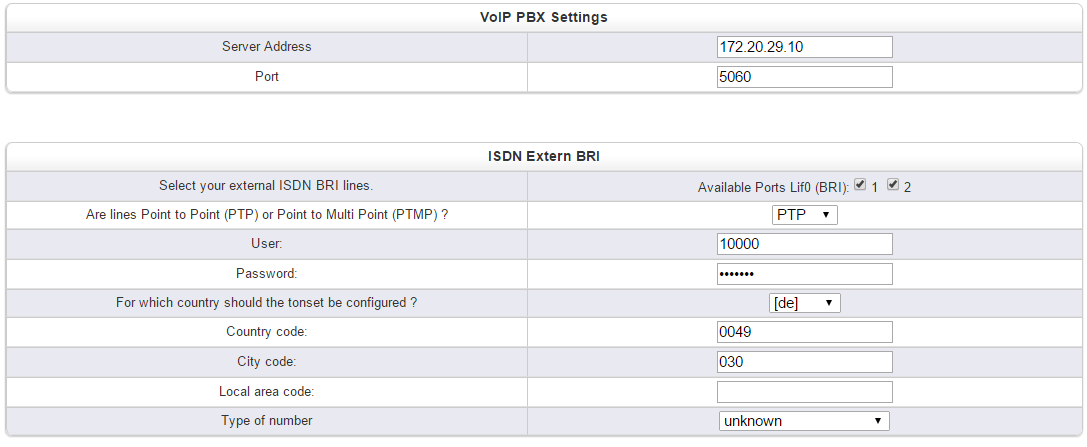
Configure the beroNet gateway
Once the configuration on the 3CX part is done, clique on "generate device config" on the top:

Related content
If you need scheduled remote assistance, you can request our on-demand support services: https://www.beronet.com/support